 |
| Peek at My Handmade Tattoo Art Wedding Card |
The World Around Me
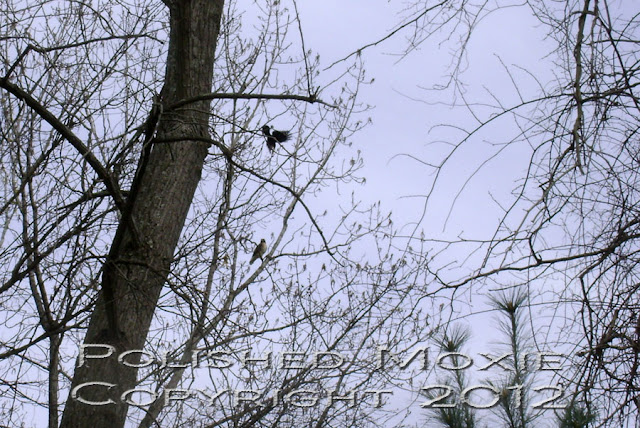
Since my card features imagery representing love, I thought I would share a little action in my backyard that is the polar opposite...combat. While working in my gardens it became eerily quiet around me and I had that uncomfortable feeling that I was being watched. I looked up and through the trees to see if there was anything beyond the tree line, but didn't see anything. Then I looked up above me and that's when I saw him.
 |
| Red Tail Hawk High in a Tree |
A large red tail hawk was eyeballing me. Then I heard a screech and I saw a kamikaze crow heading right toward him from above.
 |
| Crow Dive Bombing Hawk Sitting in a Tree |
Mr. Red Tail had gotten too close to a crow's nest in the woods. After this initial attack the hawk took off across the sky and the air show began.
 |
| Hawk and Crow Flying Among the Trees |
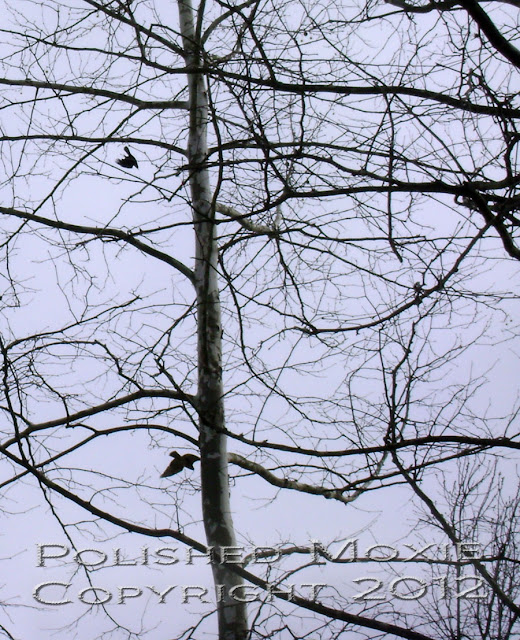
It didn't end there! The kamikaze crow continued his attack in the sky above me.
 |
| Crow Areal Dive Bombing of a Hawk |
Look at that crow in the upper left of the picture! He's practically vertical and almost on his back in that dive toward the hawk below. With this final attack, I guess the crow decided he had defended his nest enough and the two circled a couple of more times and then parted company.
 |
| Crow and Hawk Circling in the Sky |
My Love of Papercrafting Challenges
I follow many challenge blogs and my handmade Tattoo Art Wedding Card reflects the following challenges:
- Stampin' for the Weekend challenge is to use no less than 4 layers. My handmade tattoo art wedding card has 4 layers on the base card (rounded corner panel, shaped image background panel, blue image mat, and image panel).
- The Stamp Man Challenge is using your favorite technique. My favorite technique is gamsol and I used it to color the image on my handmade wedding card.
- Cardmadfairy's Digi Days Challenge is for a clean and simple design. I think my handmade tattoo art wedding card meets this criterion (at least it is CAS for my style of card making).
- Catch the Bug challenged us to use things with wings. The bird on my handmade wedding card meets that criterion.
- Totally Stampalicious challenge is for a clean and simple design. My handmade tattoo art wedding card is a CAS design for my card making style.
- Make it Monday is an anything goes paper craft so I'm using my handmade wedding card.
- Paper Sundaes challenged us to use things with wings on our creation. I used a bird image on my handmade tattoo art wedding card.
- Bearly Mine Challenges asked us to use dies. I used 3 different dies to create my handmade wedding card.
- Creative Craft Challenges this week wanted to see distressing. I used distress ink around the edges of the panels on my handmade tattoo art wedding card to give it a vintage distressed appearance.
- Flourishes Timeless Tuesday Challenge asked that you select a letter of the alphabet and then use at least 3 elements on your creation that start with that letter. I selected the letter "B" for my handmade wedding card. I used a Bird image, Blue pencils to color him, Blue cardstock to mat my image, and Bling on each of the 4 corners.
Handcrafting My Handmade Tattoo Art Wedding Card
Card Statistics
- Final Card Size: 5.5" tall x 4.25" wide
- Tools: tattoo stamp, scoring board, paper cutter, blending tool, scissors, ruler, blending stumps computer, Cuttlebug machine, dies, corner rounder punch
- Materials: cardstock, cover stock, adhesive, gamsol, colored pencils, inks, rhinestones
- Card can be Purchased in My Polished Moxie Etsy Shop: Handmade Tattoo Art Wedding Card
Front View of My Handmade Tattoo Art Wedding Card
 |
| Front - My Handmade Tattoo Art Wedding Card |
For this card I used the same basic design as I used on my handmade Tattoo Art I Love You card. I created the card base from white cardstock that I scored at the top so that it opens vertically from the bottom. I cut a panel of white cardstock that I rounded the corners on and then used my blending tool to ink its edges with distress ink to give it an antiqued appearance. I set this panel aside.
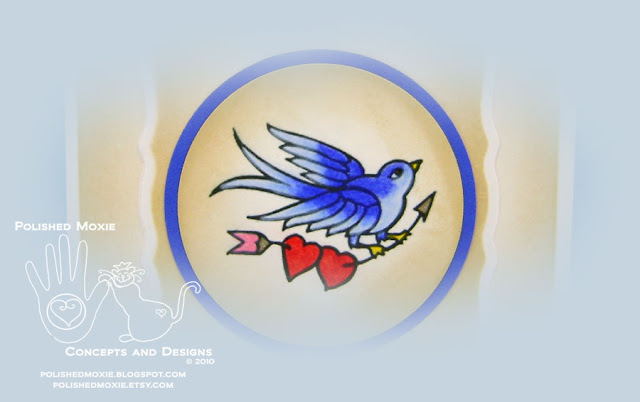
As the focal point of my handmade card I used a classic tattoo digital image that I printed on white cardstock and colored using gamsol and colored pencils. I die cut my colored image out in a circle shape and used my blending tool to apply distress ink around the edges in a continuation of my vintage look. To make the image pop I matted it with a blue cardstock the same color as the dark blue in my bird. I set my image panel aside.
As a backdrop to my matted image I die cut a shaped panel from white cardstock and dry embossed its outer edge. I left my die cut in place and with my blending tool applied distress ink. Upon removing my die cut, I had a clean, crisp white edge around my background panel that would emphasize my image. I popped my matted image slightly off the surface of this background panel so that the curves on the edge of the panel hug the outer circle of my image. I affixed this panel to my rounded corner panel which completed my topper panel. This topper was affixed to my card base.
As a finishing touch to my card front I added a red rhinestone in each of the rounded corners on my panel. These rhinestones added a little dimension to the card and made the red hearts in my image pop.
Angle Views of My Handmade Tattoo Art Wedding Card
 |
| Angle Left - My Handmade Tattoo Art Wedding Card |
 |
| Angle Right - My Handmade Tattoo Art Wedding Card |
Note how the white edges around each panel make the panels appear to pop from the surface and add visual dimension to the face of my card. Also, the distress ink provides additional perceptive dimension. The only panel that is truly popped from the card surface is the image with its blue mat.
Inside Panel of My Handmade Tattoo Art Wedding Card
 |
| Inside - My Handmade Tattoo Art Wedding Card |
For the inside of my card I mimicked its front with the rounded corner panel and the die cut shaped panel. No true dimension, just the illusion of dimension through my distress ink and the crisp, white borders.
I constructed a white envelope from heavy cover stock and decided to leave it plain without any embellishment.
Final Handmade Tattoo Art Wedding Card and Handmade Envelope Set
 |
| My Handmade Tattoo Art Wedding Card and Handmade Envelope Set |
I really like the way that this card came out so rich in color, yet clean and simple in architecture. The blue border around the tattoo art draws your eyes into the image and the red bling makes the hearts pop. Although I created this card as a wedding or engagement card, it could be used for an anniversary, a valentine or special romantic occasion with the one you love.
This card set is available in my Polished Moxie Etsy Shop: Handmade Tattoo Art Wedding Card.
Card Recipe Specifics for Handmade Tattoo Art Wedding Card
- Cardstock: Wausau, Recollections
- Cover Stock: Staples
- Digital Stamp: Dover Copyright Free Classic Tattoo
- Ink: Ranger Distress antique linen
- Rhinestones: Studio G
- Prismacolor Pencils: metallic gold, crimson red, crimson lake, pink, chocolate, powder blue, ultramarine, spanish orange
- Dies: standard circles large, standard circles small, and curved rectangles all Spellbinders Nestabilities
- Punch: corner rounder by EK Success
- Tools: scoring board, paper cutter, blending tool, scissors, ruler, blending stumps, computer, Cuttlebug machine
- Misc: gamsol, adhesive
- Techniques Used: gamsol, die cutting, embossing, stenciling, sponging, distressing
So ends another jaunt along my handcrafting card journey with my handmade tattoo art wedding card. A unique wedding card that can also be used for an engagement, anniversary, valentine, or just that special romantic occasion with the one you love. Thank you for visiting my blog and allowing me to share my handmade card and photography with you. I hope you enjoyed your visit and will come back soon!
Don't forget to show a little "Moxie" love and hit the Polished Moxie like button on my sidebar or to the right of the Polished Moxie logo below :)
Don't forget to show a little "Moxie" love and hit the Polished Moxie like button on my sidebar or to the right of the Polished Moxie logo below :)
Page Content © 2012 Polished Moxie Concepts and Designs


Lovely card. Thanks for joining us this week at Creative Craft Challenges. NancyD
ReplyDeletethis is one,beautiful card,bless you for playing at creative craft challenge this week,hugs Cherylxxxx
ReplyDeleteWhat gorgeous coloring and shading. I really need to break out the gamsol and pencils. Thanks for the inspiration. Love the clean, crisp and uncluttered design which really enhances the image.
ReplyDeleteYour tattoo cards are amazing! What a fantastic and unique idea for a wedding card. :)
ReplyDeleteThank you so much for taking the time to link up your talent and creative ideas with us at Make It Monday!
Lisa xx
What a fabulous card and interesing post. I love it. Thank you so much for joining us at Bearly Mine this month, I really enjoyed looking at your work.
ReplyDeleteGood Luck with the Challenge and we hope to see you again soon.
Hugs
Laine
X
Lovely card, beautiful bird. Thanks for sharing with Flourishes.
ReplyDeleteSuch a pretty card. Love the way you colored the bird image and was struck by the awesome distressing you did. It really brings out the tattoo image. Love the shape too.
ReplyDeleteVery unique card. Thanks for joining the challenge at Cardmadfairy.
ReplyDeleteLynnx
Dt
A very unique card and great idea. Love the bird pics too. Thanks for joining us at The Stamp Man and have a wonderful day. Angela
ReplyDeleteBeautiful colouring. Thanks for sharing with us at Paper Sundaes. Jenny x
ReplyDeleteWhat a unique and interesting wedding card! That one would certainly stand out to me if I had received it! Fantastic coloring skills, too :)
ReplyDeleteThank you for joining us in Flourishes Timeless Tuesday!
~ Amanda :)
Fabulous coloring and shading. Thank you for sharing your creation with us in our "Things With Wings" challenge at Catch The Bug! We appreciate that you "spread your wings" and joined us! ~~Sammibug~~ DT Member For Bugaboo Stamps
ReplyDeletegreat card. Thanks for joining us at Bearly Mine, good luck and hope to see you again.
ReplyDeleteHugs
Tracey
Those panels are a great layout. Thanks so much for joining in with us this week for the Catch The Bug Things With Wings Challenge with Bugaboo Stamps. I hope you enjoyed it enough to join us again for our next challenge. Right, I’m now going to FLY away and see what else I can find!
ReplyDeleteTFS
Paul
Crafty Blogocks
DT Member for Catch The Bug
Very pretty and wonderful CAS card! I love the blue bird image. Thank you for playing along at the FTTC.
ReplyDelete