Before getting into the details of my card I want to show you a couple of very spoiled squirrels I caught sight of while looking out my window.
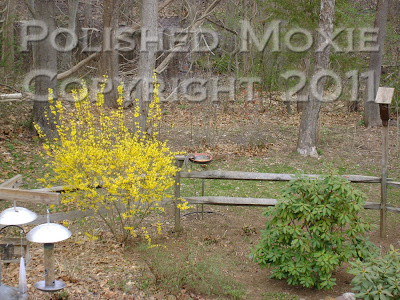
This first one is spread out in the feeder on the fence stuffing himself. The feeder is to the right of the bright yellow forsythia bush. You might have to click on the picture to enlarge it so that you can see him better. Talk about lazy! The next thing you know he'll be wanting me to hand feed him. He's made himself pretty comfortable and every so often he changed reclining positions to get better access to the food.
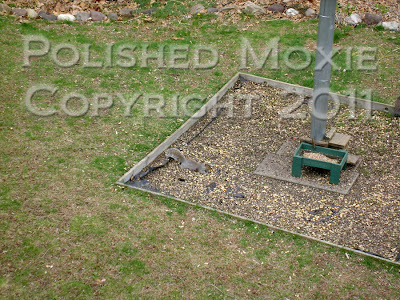
Here he is in another relaxing position. You'd think he was at the spa. At the same time this squirrel was rolling in luxury I looked at my bird feeding area and caught another spoiled, lazy squirrel.
He too is flat out on his belly eating goodies. He's really going to feel like he's died and gone to heaven once we install the new matting and mulch in the feeding area. Right now it's pretty worn from the hard winter and all the scratching and digging by the critters. Oh well, I love watching the activity in my backyard...even the spoiled rotten squirrels.
Okay, now down to card business.
Creating My "I Love You Teddy Bear Card"
Card Statistics
- Final Card Size: 6.5" tall x 5 1/8" wide
- Tools: Martha Stewart scoring board
, PSX teddy bear stamp
, Fiskars texture plate
, Cuttlebug machine
, Making Memories paper cutter
, blending stumps, scissors, ruler, sponge pieces
- Materials: cardstock, scrapbook paper, cover stock, ribbon, buttons, adhesive, Stazon ink
, Colorbox inks
, gamsol, Prismacolor pencils
, white gel pen, black gel pen, spray sealer
- You can purchase this card in my Polished Moxie Etsy Shop: I Love You Teddy Bear Card
Card Front
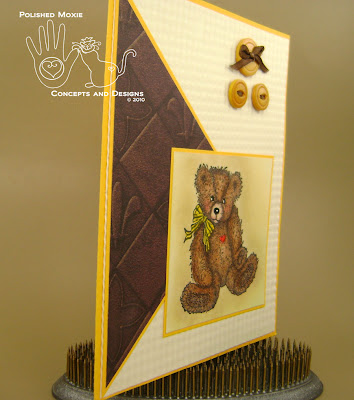
I scored cheddar yellow cardstock for the card base and set it aside. For the front panel I texturized cream cardstock by running it and a Fiskars texture plate through my Cuttlebug machine. I layered the textured cardstock with a triangular shaped brown scrapbook paper matted with cheddar yellow cardstock. The scrapbook paper I selected had a tiled pattern to reflect the square pattern in the textured cardstock.
For the image I stamped the teddy bear on cream cardstock in black ink and colored him using gamsol and Prismacolor pencils. To add depth to the image I sponged a palette of yellow colors around Teddy. As a finishing touch I used a black gel pen to define Teddy's eyes, nose, and mouth and topped them off with a white highlight. I matted this image on cheddar yellow cardstock and affixed it to the front panel.
Here's a close up of Teddy.
I love the little heart on his chest and I think it ties in perfectly to my card's theme.
To complete the front panel I added three cheddar yellow buttons adorned with brown ribbon. I affixed the completed front panel to the front of the card base.
Angle Views of Card Front to Show Dimension
As you can see from the two pictures above, the only dimension on the card is the texture of the cream cardstock and the trio of buttons.
Inside Card
For the inside I used a play on words and printed "I Love You Bear-y Much" in brown ink on cream cardstock. I thought this sentiment would make someone smile and could be used for a wide range of occasions. To adorn the inside panel I cut out three tiles from the brown scrapbook paper and affixed them to a strip of cheddar yellow cardstock.
I constructed a coordinating envelope from heavy cover stock and printed Teddy's sweet face in the lower left hand corner. I sprayed the image with sealer to protect it in the mail.
Final Card and Envelope Ensemble
I adore this teddy bear stamp and am using it on several other cards that I will be sharing with you. Get ready for a parade of teddy bears in future posts.
You can purchase this card in my Polished Moxie Etsy Shop: I Love You Teddy Bear Card
Card Recipe Specifics
- Cardstock: Hammermill, Wausau
- Cover Stock: Staples
- Scrapbook Paper: Provo Craft
- Stamp: PSX
- Ink: Stazon black
, Colorbox
- Prismacolor Pencils
: crimson red, peach, light peach, beige, chocolate, dark umber, light umber, dark brown, chestnut, terra cotta, spanish orange, sunburst yellow
- Ribbon: Michaels
- Tools: scissors, ruler, blending stumps, sponge pieces, Martha Stewart scoring board
, Making Memories paper cutter
, Fiskars texture plate
, Cuttlebug machine
- Misc: gamsol, adhesive, buttons, white gel pen, black gel pen, spray sealer
- Techniques: stamping, gamsol, sponging
Thank you for visiting my blog and I hope you come back soon!
Page Content © 2011 Polished Moxie Concepts and Designs


Aw, what an adorable teddy bear card! Your coloring is lovely and you've used a wonderful layout! Love the sweet buttons too! Thanks for playing along @ The Corrosive Challenge! :)
ReplyDeleteYour teddy bear card is so adorable! I just want to give him a hug :-)
ReplyDelete