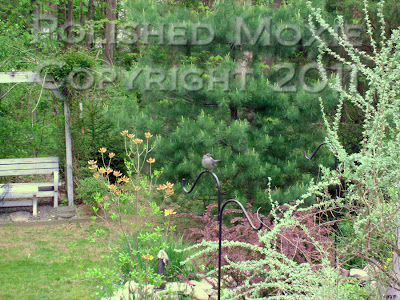
Before getting into the nitty-gritty of my card, here's a little taste of nature from my garden.
I know summer is here when I hear our catbirds. We have two pairs running around hunting in our garden this year. These pictures are of one of the catbirds sitting on one of my plant hangers and posing for me.
Creating My "Santa and Reindeer Over the City Christmas Gift Card Holder"
Card Statistics
- Final Size: 5" tall x 4" wide
- Tools: Martha Stewart scoring board
, Santa and reindeer stamp, city skyline stamp, Making Memories paper cutter
, sponge pieces, Nestabilities Labels Seven
, Nestabilities Standard Circles Large
- Materials: cardstock, cover stock, Stazon ink
, Colorbox ink
, Tsukinek VersaMagic ink, adhesive, spray sealer
- This gift card holder is available in my Polished Moxie Etsy Shop: Santa and Reindeer Over the City
Card Front
The first thing I did was sponge on a variety of inks in shades of blue on a piece of white cardstock. I started with my lightest color at the bottom of the cardstock and worked my way up adding darker shades of blue as I went. To create the city at the bottom of the panel I stamped a cityscape in black on yellow cardstock and then fussy cut it out. The yellow of the cardstock shows through the buildings where the windows are located on the stamp. I affixed my completed city in place so that the lighter blue color of my background created a slight glow across the skyline.
Once I had the city in place I constructed the moon. Normally I would have incorporated the moon into my background by using a circle of cardstock over the area where I wanted the moon and sponging around it. For this card, because of the Santa and reindeer silhouette stamp I was using, I was afraid it would take more than one try to get it right. With this in mind I decided to create the moon on a separate piece of white cardstock and affix it in place.
For the moon I sponged a couple of shades of yellow on white cardstock and then used my Nestabilities to cut out the circle. I stamped Santa and his reindeers on the moon and then sponged some of the darker blues around the edge. I positioned the moon on the panel and sponged some pale yellow ink around it to highlight it in the sky. This completed my cityscape Christmas scene.
I matted my completed scene on navy blue cardstock. Using the front panel as my guide I selected a light blue cardstock for the base card. I cut a piece of the light blue cardstock to measure 4 inches wide and 11 inches long. Placing the 11 inch edge along the top of my scoring board, I scored the cardstock at 4 inches and 10 inches. The 4 inch score is the fold for the top of my card and the 10 inch score creates the pocket on the inside of my card for the gift card. I affixed the front panel to the front of this card base.
Angle View of Card Front to Show Dimension
As you can see from the pictures above the only dimension on the face of the card is created by my sponged background.
Inside Card
For the inside I added a little height to the gift card pocket by cutting a piece of navy cardstock using my Nestabilities and affixing it to the 1 inch scored pocket flap. After adding the decorative edge I applied glue along the two side edges to create the gift card pocket. I sponged a little ink along the bottom of the pocket and affixed another moon with Santa in the lower left hand corner of the pocket.
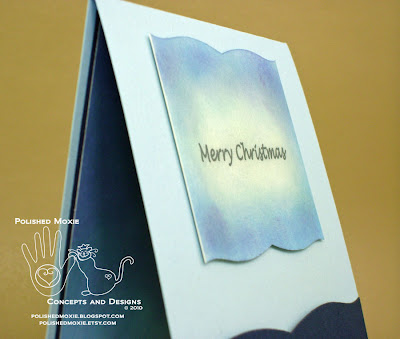
The inside sentiment "Merry Christmas" is printed on white cardstock and I cut it out using my Nestabilities. I sponged ink on the sentiment panel to reflect the colors used on the front of the card and affixed it to the inside of the card slightly off the surface.
Here's a close up of the sentiment panel to show you its dimension.
One final picture of the inside of my card with a gift card placed in the pocket.
I also constructed an envelope from heavy cover stock to coordinate with the card. I sponged a moon and sky in the lower left corner and stamped on Santa and his reindeer. To protect the image for its future travel in the mail system I sprayed it with sealer.
Final Card and Envelope Ensemble
I must say that creating this card did keep my mind off the heat...at least for a little while.
This gift card holder is available in my Polished Moxie Etsy Shop: Santa and Reindeer Over the City
Card Recipe Specifics
- Cardstock: Wausau, The Paper Company, Hammermill
- Cover Stock: Staples
- Stamps: City Skyline by Stampabilities, Santa and Reindeer by Inkadinkado
- Dies: Nestabilities Labels Seven
, Nestabilities Standard Circles Large
- Inks: Stazon black
, Colorbox Fluid Chalks (ice blue
, french blue, blueberry
), Tsukinek VersaMagic (aegean blue
, aspen mist
), Colorbox Petal Points Arboretum
- Tools: Martha Stewart scoring board
, Making Memories paper cutter
, sponge pieces
- Misc: spray sealer, adhesive
- Techniques: Sponging, fussy cutting
Thank you for visiting my blog and I hope you come back soon!
Page Content © 2011 Polished Moxie Concepts and Designs


Beautiful over the city Christmas card. I love the way you finished off the inside too! Great picture of your catbird. Isn't it nice to have nature flying by when you are outside? You seem to have quite a few more critters around than I do.
ReplyDeleteHi there,
ReplyDeleteI know I already commented on your beautiful card, but just wanted to stop by to say hello! Are you having a nice summer?