Today I thought I would share a simple birthday card that I made. I wanted to create a birthday card that could be given to a man or a woman and incorporated a little humor for the occasion. The card I came up with is designed around the plaid paper I selected. I used a color palette of blues and browns with a touch of green and yellow. I thought these colors were pretty versatile and the plaid tied it all together. The cupcake with a bite out of it and the birthday message on the card adds that touch of humor I was after.
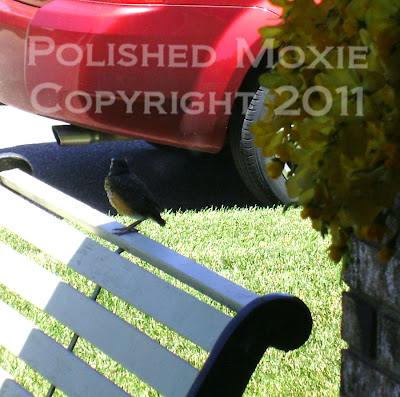
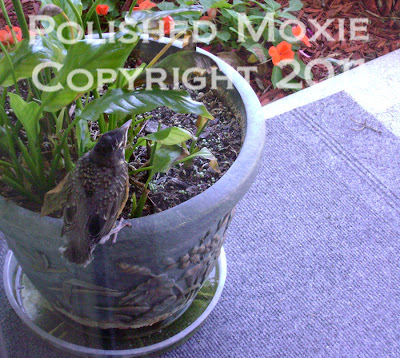
Speaking of birthdays...this little guy is not too old and he's out exploring the big new world around him.
This baby robin was exploring my parent's front porch area. He started off on the bench.
Then he moved to a potted plant.
You can see daddy robin crouched down in the grass below the red arrow. We had already seen him and mama robin dive bomb a couple of squirrels in the area so I wasn't taking any chances!
The Making of My "Chocolate Cupcake" Birthday Card
Card Statistics
- Final Size: 5.5" wide x 4.25" tall
- Tools: oval cutter, paper cutter, cupcake stamp, cupcake punch, scoring board, dry embossing stylus, blending stumps, scissors
- Materials: ink, colored pencils, gamsol, shimmer paints, adhesive, cardstock, scrapbook paper, cover stock, organdy ribbon, foam dimensionals, diamond glaze, liquid snow
- This card is available in my Polished Moxie Etsy Shop: Chocolate Cupcake Birthday Card
Card Front
To begin this card I selected the plaid paper and used it as a starting point for my color palette. I used kraft cardstock for the base card and created a topper panel for the front. For this panel I layered light blue cardstock with royal blue cardstock on the upper portion and the plaid paper on the lower portion. I affixed a brown organdy ribbon and bow over the interface of these two layers.
For the focal point of the card I stamped a cupcake on white cardstock and colored it using gamsol and Prismacolor pencils. I fussy cut the colored cupcake and incorporated the bite mark. To add dimension to the cupcake I used a liquid snow writer to frost it. Once the frosting was dry I painted it with a variety of shimmer paints to give it a shiny chocolate appearance. As a final touch I added diamond glaze to the candle light.
I felt that the cupcake needed a dessert plate to sit on so I created one from an oval of light blue cardstock. Using an embossing stylus I embossed the center of the plate to add dimension and then shaded it with Prismacolor pencils and gamsol. I affixed the plate to the topper panel and then popped the cupcake on it with foam dimensionals.
To complete the topper panel I printed "At Your Age..." on a white oval of cardstock and matted it with light blue cardstock. I affixed the sentiment above the bow.
Angle View of Card Front to Show Dimension
The pictures above show you the dimension of the elements on the front of the card. You can see the dimensional aspects of the cupcake and its frosting.
Inside Card
For the inside panel I printed "What's another friggin' candle? Happy Birthday!" on white cardstock and matted it with light blue cardstock. To finish off this panel I added a strip of the plaid paper and topped it with a cupcake punched from yellow cardstock.
I also constructed an envelope from heavy cover stock to coordinate with the card. I affixed a strip of the plaid paper down the left side and topped it with three cupcakes punched from yellow and light blue cardstocks.
Final Card and Envelope Ensemble
This is a simple card and envelope set. I like the way the frosting came out on the cupcake using the snow writer.
This card and envelope ensemble is available in my Polished Moxie Etsy Shop: Chocolate Cupcake Birthday Card
Card Recipe Specifics
- Cardstock: The Paper Company, Recollections, Wausau
- Scrapbook Paper: DCWV
- Cover Stock: Staples
- Stamp: Hampton Art Studio
- Punch: Dollar Store
- Ribbon: Michaels
- Ink: Stazon black
- Prismacolor Pencils: dark umber, chocolate, jasmine, spanish orange, copenhagen blue, poppy red, apple green, spring green
- Shimmer Paints: Yasutomo
- Tools: Martha Stewart scoring board, Making Memories paper cutter, EK Success Curvy Oval Cutter, dry embossing stylus, blending stumps, scissors
- Misc: DecoArt snow writer, adhesive, foam dimensionals, gamsol, diamond glaze
- Techniques: gamsol, dry embossing, fussy cutting
Thank you for visiting my blog and I hope you come back soon!
Page Content © 2011 Polished Moxie Concepts and Designs


What a cute baby Robin! We have so many hopping around our yard. Your chocolate cupcake card looks delicious. Don't forget to blow out the candle!
ReplyDelete