Speaking of sisters...hey Sis...two pictures just for you.
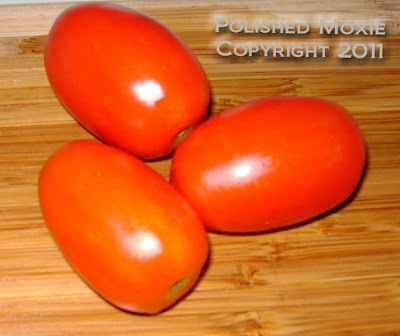
These are the first plum tomatoes I got from my garden a while back. Yum! I've since harvested around 75 tomatoes from my various plants. It's now time to make some sauce.
The next picture will have meaning for my sister, but on this one for the rest of you I'll leave it to your imagination.
Creating My "Best Sister" and "Friendship" Cards
Card Statistics
- Final Card Size: 5.5" tall x 4.25" wide
- Tools: girl stamps, scoring board, paper cutter, letter punch, hydrangea punches, scissors, ruler, blending stumps, computer
- Materials: cardstock, scrapbook paper, cover stock, ribbon, adhesive, colored pencils, gamsol, Stazon ink
- These cards are available in my Polished Moxie Etsy Shop: Best Sister Card and Friendship Card
Card Fronts
As a starting point for my sister card I selected a piece of scrapbook paper that was cheerful and reminded me of my Sis. From there I rummaged through my cardstock and found colors that complimented my paper. In the case of this card I decided to use red and pale blue as my predominate colors with a splash of yellow. I created the base card and then added a topper panel before affixing the image and hydrangea blossom. The base card is scored at the top so that the card opens vertically from the bottom.
For my topper panel I layered pale blue cardstock with a piece of yellow cardstock and a piece of my printed paper. Where the two pieces meet I positioned a strip of white grosgrain ribbon and tucked the ends around the back of the panel. At this point I affixed the topper panel to my red card base.
Next I created my image. I stamped the girls image in black ink on white cardstock and colored it using gamsol and colored pencils. You'll notice that I even added a shadow around their feet to ground them. Once I completed the image I cut the cardstock into an interesting shape and matted it with red cardstock. I affixed the image to my card front.
After completing the image, I created the hydrangea blossom using two different punches that gave me three different sizes of blossoms. I used two large blossoms (one each of the red cardstock and printed paper), two medium blossoms (one each of the red cardstock and printed paper), and two small blossoms (one each of the red cardstock and yellow cardstock). I layered the blossoms using silicone glue to add dimension. I positioned the completed blossom on the card but did not attach it because I wanted to affix my lettering first.
For the lettering I used my letter punch and punched "SISTER" from red cardstock. I positioned the letters on the white ribbon and attached them using silicon glue. Once the letters were in place I attached my blossom using silicone glue. This completed the front of my card.
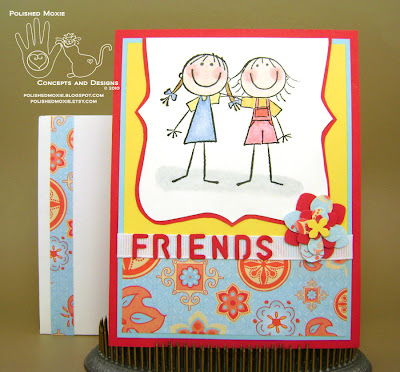
Here's a picture of my friendship card. It was made in the identical manner to my sister card with the exception of the image and the word "FRIENDS".
Angle Views of Card Fronts to Show Dimension
Here's a closer look at the blossom.
And here are some pictures of my friendship card.
Inside Cards
For the inside panel of my sister card I printed "There is no better friend than a sister. And there is no better sister than you." on white cardstock. To embellish this panel I affixed a strip of the printed paper that I matted with pale blue cardstock. I attached the completed panel to the inside of the card base.
The inside panel of my friendship card was made in the identical manner; however, I used a different message. On it I printed "The best things in life aren't things at all...They are Friends like you!"
As is my norm, I constructed envelopes for each of these cards from heavy cover stock. For an embellishment to compliment the cards I affixed a strip of the printed paper down the left side of each envelope.
Final Card and Envelope Ensembles
So there you have it, my two cards in honor of my love for my Sister.
Both of these card sets are available in my Polished Moxie Etsy Shop
Card Recipe Specifics
- Cardstock: Hammermill, Wausau
- Scrapbook Paper: DCWV
- Cover Stock: Staples
- Stamps: Me and My Big Ideas
- Punches: Hydrangea and 3-in-1 Hydrangea from Martha Stewart; letter punch from Marvy Uchida
- Ribbon: Offray
- Ink: Stazon black
- Prismacolor Pencils: peach, light peach, carmine red, crimson red, periwinkle, sky blue light, indigo blue, sand, chocolate, goldenrod, cool grey 30%
- Tools: Martha Stewart scoring board, Making Memories paper cutter, ruler, blending stumps, scissors, computer
- Misc: adhesive, silicone adhesive, gamsol
- Techniques: stamping, gamsol, punch art
Thank you for visiting my blog and I hope you come back soon!
Page Content © 2011 Polished Moxie Concepts and Designs


I have tears in my eyes. What a wonderful post about your sister - your best friend. I don't have a sister, but yours sounds special. Enjoy your garden and all the wonderful tomatoes you have harvested.
ReplyDelete