 |
| Peek at my Handmade Desert Sunset Card |
Another handmade card with a southwestern flair using digital silhouettes. I liked the two previous southwestern silhouette cards that I shared on this blog, Handmade Southwestern Sunset Card and Handmade Southwestern Sunrise Card. I thought I would use the same techniques, but simplify the design for my new card. The design is a simple panel with a desert sunset scene as its focal point. I selected richer and somewhat brighter colors for this handmade card. I wanted my desert sunset card to be eye-catching, yet portray a quiet reflection of nature's beauty. I used both digital and non-digital techniques to create the desert sunset scene.
Before getting into the details of my sunset card I want to share a quick story with you. Last weekend my husband and I were looking out over the wooded area behind our house and quietly talking when we heard a rustle to our left. Looking over in the direction of the sound we saw a large red fox shoot out from a pile of branches and run through the trees.
 |
| Red Fox Running in the Woods |
Now I know this is not a great picture, but I was amazed that I even got a picture of him with my little camera and how fast he was running. He's under the red arrow. If you look closely you can see his silhouette and ears sticking up. Here's a digitally zoomed picture of him.
 |
| Closer View of Red Fox Running in the Woods |
If you look past the fox, you'll see a brush pile. Once he reached that pile he stopped and looked back at us.
 |
| Red Fox Peering Out from a Brush Pile |
Again, not a great picture, but he is located under the large branch below the arrow. Here's a digitally zoomed picture of him.
 |
| Closer View of Red Fox Peering Our from a Brush Pile |
Look closely and you can see his face looking back at us. He stood there for several moments before turning and disappearing into the brush. Exciting things are happening in them there woods. Also, exciting card making going on in my workspace.
My Love of Papercrafting Challenges
I follow many challenge blogs and my handmade Desert Sunset Card reflects the following challenges:
- Mark's Finest Papers Speedy Fox and Friends Challenge to show the rainbow. I think my handmade Desert Sunset card meets this challenge because of the rainbow of color in my sunset.
- One Stitch at a Time Challenge to use brights. My handmade Desert Sunset card has a bright colorful background and I used a bright idea when combining digital silhouette stamping with my hand sponged and blended background.
- Paper Sundaes Challenge of anything goes and my handmade Desert Sunset card meets this criteria.
- Incy Wincy Designs Challenge to use only digi stamps. My handmade Desert Sunset card fits this challenge since all of its silhouettes are digital stamps.
Handcrafting My Desert Sunset Card
Card Statistics
- Final Card Size: 5.5" wide x 4.25" tall
- Tools: cactus stamp, silhouette stamps of woman and grasses, scoring board, paper cutter, blending tool, sponge pieces, computer, non-stick craft mat
- Materials: cardstock, glossy cardstock, inks, spray sealer, adhesive, cover stock
- Card can be Purchased in My Polished Moxie Etsy Shop: Handmade Desert Sunset Card
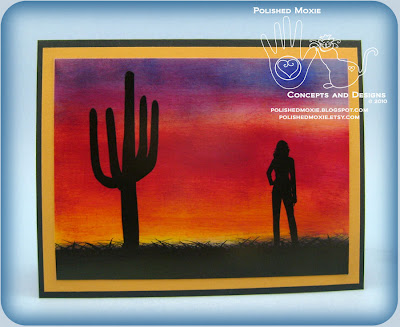
Front View of My Handmade Desert Sunset Card
 |
| My Handmade Desert Sunset Card |
To start my card I created the card base from black cardstock and scored it horizontally so that the card is wider than it is tall. My next step was to create the sunset background for my front panel.
Creating My Desert Sunset
I sponged several inks on glossy cardstock and blended them from the bottom up using my blending tool. I made the panel about 1/2" taller than I needed for the front so that I could use a strip of the finished sunset to embellish the inside panel of my card.
You can see that I started with a bright yellow at the bottom for the setting sun and worked my way up with orange, red, a little more yellow, purple and finally blue. When all of my ink was sponged on the glossy cardstock I used my Ranger blending tool and with a light touch working from bottom to top I blended the sunset. This resulted in more of a cloudy streaked effect instead of a sponged effect. I allowed my sunset to thoroughly dry before moving on to my next step.
Adding the Silhouettes to My Desert Sunset
Once my sunset was dry, I sized it to fit the front of my card base and cut a strip from the bottom to be used on the inside of my card. I added the silhouettes (saguaro cactus, grasses, and woman digi stamps) digitally by printing them on my inked background.
To accomplish this task I used Photoshop Elements. I started with a blank file the size of my sunset panel. I added my digital images, sized them and created the layout that I wanted. Note that the saguaro cactus I made into a silhouette by coloring it in with black in Photoshop Elements. The other digital images were already silhouettes. When I was satisfied with my layout, I placed my sunset panel in my printer and printed the digital images on it. I allowed the completed panel to thoroughly dry and then sprayed it with matte sealer to protect the ink.
I matted the completed image with a butterscotch cardstock that brought out the colors of my sunset and affixed it to my card base.
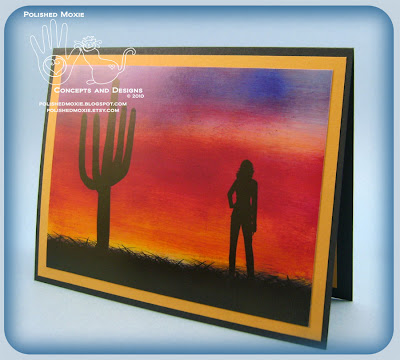
Angle Views of My Handmade Desert Sunset Card
 |
| Angle Left - Handmade Desert Sunset Card |
 |
| Angle Right - Handmade Desert Sunset Card |
As you can see from these angle views of my card, all of the depth and dimension is created visually and through color and silhouette placements.
Inside Panel of My Handmade Desert Sunset Card
 |
| Inside Panel - Handmade Desert Sunset Card |
For the inside panel I matted cream cardstock with butterscotch cardstock and embellished it with the strip of the sunset panel that I had previously cut. I left the remainder of the panel blank.
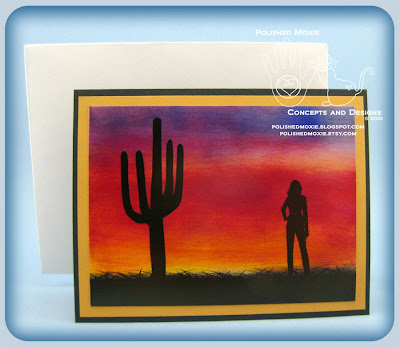
I decided to construct a plain white handmade envelope for my card. I used heavy cover stock for the envelope.
Final Handmade Desert Sunset Card and Handmade Envelope Set
 |
| My Handmade Desert Sunset Card and Handmade Envelope Set |
Here's my final set. A handmade card that focuses on the sunset and is simple in architecture, plus its plain white handmade envelope.
This card set is available in my Polished Moxie Etsy Shop: Handmade Desert Sunset Card
A tip from me: Scan your handmade sunsets and backgrounds into your computer so that you can use them for later digital projects.
Card Recipe Specifics for Handmade Desert Sunset Card
- Cardstock: Embassy, The Paper Company, Wausau, Ocean State
- Cover Stock: Staples
- Digital Stamps: saguaro cactus from Digi Doodle Shop, grasses and woman silhouettes from All Silhouettes
- Ink: all inks from Colorbox
- Tools: scoring board, paper cutter, blending tool, sponge pieces, computer, non-stick craft pad
- Misc Materials: adhesive, spray sealer
- Techniques Used: sponging, digital stamping, blending
So ends another jaunt along my handcrafting card journey with my handmade desert sunset card. A sunset card that utilized both digital and non-digital techniques to create its southwestern silhouettes against a colorful sky. Thank you for visiting my blog and allowing me to share my handmade card and photography with you. I hope you enjoyed your visit and will come back soon!
Page Content © 2012 Polished Moxie Concepts and Designs


Lovely card! Thank you for sharing at One Stitch at a Time and good luck with the challenge. Judy DT x
ReplyDeleteWhat a lovely sunset! Thanks for sharing with Speedy Fox and Friends!
ReplyDeleteBrilliant background!! Love how you have created it. Thank you for joining us this week at OSAAT. Good luck. hugs
ReplyDeleteNIKKI DT
Beautiful card. Gorgeous coloring. Love the pictures of the fox in the woods. Thanks for playing along with us here at Speedy Fox and Friends challenge, we hope to see you again next week. Make sure to check out our challenge with Friends of SpeedyTV for more fun and more chances to win with Mark's Finest Papers, a Heinrich Co.
ReplyDeleteLovely sunset. Thanks for joining Speedy Fox and Friends.
ReplyDeleteGorgeous color combination! This card really appeals to me - spotted it straight away and had to take a closer look!
ReplyDeleteWow! Very Very cool! Thanks for playing with us this week at One Stitch At A Time! Best of luck in the draw!
ReplyDeleteHugs,
Karen C (OSAAT DT)
www.busybusyhoneybee.wordpress.com
Hello Polished Moxie!! Thx for visiting my blog and your sweet comment! Wow, this is so gorgeous - I gotta try this technique some time!
ReplyDeleteYou had a question about what I use - foam pads! I have them in varying depths, 1mm, 2mm, 5mm - hope that answers your question!
See you again soon!