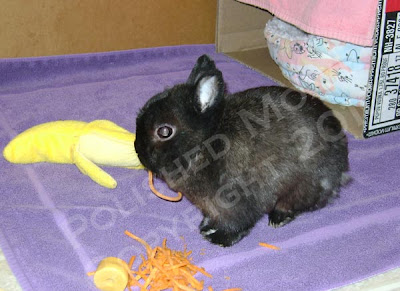
Before sharing my card, I decided to share a photo of Coco our pygmy rabbit. In this picture he's eating a piece of carrot and I think he is trying to imitate a butterfly with it. We call him our carrot connoisseur because he is picky about his carrots and only the freshest will do. Pardon his appearance...he is shedding and only tolerates a bunny brushing for a very short period of time, so we have to do it in spurts. The banana in the background is one of his favorite toys.
The Making of Got Candy Halloween Card
Card Statistics
- Final Card Size: 5.5" tall x 4.25" wide
- Image Size: 1.75" tall x 1.25" wide
- Tools: paper cutter, circle cutter, scissors, ruler, sponge pieces, stamp, Martha Stewart bat punch
, blending stumps
- Materials: cardstock, gamsol, adhesive, Prismacolor pencils
, spray sealer, ink pads, cover stock
- You can purchase this card from my Etsy shop: Got Candy Halloween Card
Card Front
I stamped my image on white cardstock and hand colored it using Prismacolor pencils and gamsol. Once the image was colored, I fussy cut it out and set it aside.
The card base was cut and scored from black cardstock. I cut out a 3" circle from yellow cardstock, a 3" circle from red cardstock, and a 2.75" circle from black cardstock. I affixed the cut out image to the black circle and matted it with the red circle. Red ink was sponged around the edge of the black circle to add depth. I also sponged a couple of different yellowish inks on the yellow circle to add depth. The yellow circle was adhered in place to represent the moon and the matted image was then positioned.
Two bats were punched from black cardstock and placed on the moon. This is all that I did for the front of the card.
Angle View of Card Front to Show Dimension
This card has no dimension to it except the perceived depth added by the sponging on the moon and image background.
Card Inside
As you can see, I used "Got Candy?" for the inside sentiment of my card. I printed it on white cardstock. The only embellishment is a black cardstock punched bat on a 2" yellow circle that was attached to the lower right corner and trimmed.
My logo in coordinating colors is placed on the back of the card.
The custom envelope is made from heavy cover stock. I stamped the same image from the card on the lower left hand corner and hand colored it using Prismacolor pencils and gamsol. Ink was sponged around the image and then sprayed with sealer to protect it.
Final Card and Envelope Combo
My husband found this card to be simple and to the point. I figured he would like it because that's how he likes his cards...simple and to the point.
This card and envelope ensemble can be purchased from my Etsy shop: Got Candy Halloween Card
Tidbit of wisdom from the experience: Keep your eyes and ears open...inspiration can come when least expected in strange places.
Card Recipe Specifics
- Cardstock: Wausau, Recollections
- Cover Stock: Staples
- Stamp: Inkadinkado
- Punch: Martha Stewart bat
- Inks: Colorbox
, Stazon black
- Prismacolor Pencils
: goldenrod, jasmine, canary yellow, apple green, olive green, crimson red, metallic silver
Thank you for visiting and I hope you come back soon!
Page Content © 2010 Polished Moxie Concepts and Designs


No comments:
Post a Comment
Thank you for taking the time to leave a comment. I welcome and appreciate all comments.