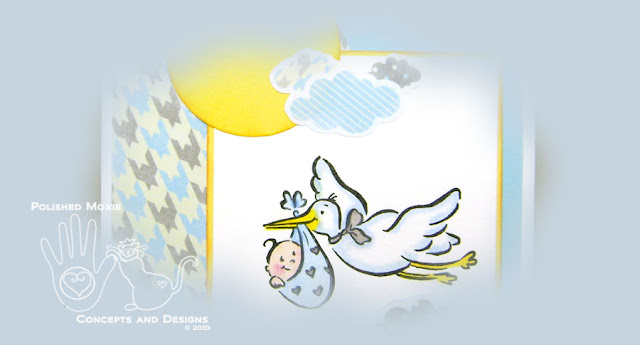
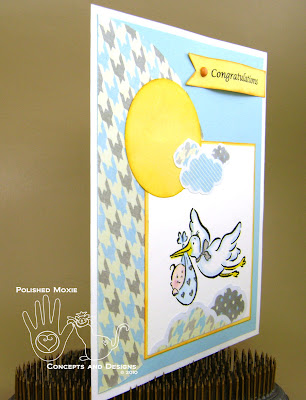
When I think of the arrival of a little one, the image of a stork carrying a bundle through the sky comes to mind. Lucky for me, I have a stamp that was perfect for this picture in my mind. Since I wanted the card to be whimsical, the stamp also fit this requirement and my selection of paper provided an extra touch of interest to my vision. I call this my "Stork Making Delivery" baby card. The name's not very creative, but hopefully the whimsy of the card makes up for the bland title.
As usual, before getting to the nitty-gritty of the card I want to share a few nature pictures with you.
My husband and I exited our garage and were squealed at...well, actually it was more of a chirp...and something shot across the drive and up into the drain pipe in our wall. My husband had his camera handy and grabbed some pictures of our little critter.
Isn't he cute? He has obviously been to the bird feeding area. Look at his fat little cheeks. We must have caught him traveling back to his home. After he decided we weren't going to hurt him, nor were we leaving the area immediately, he made himself comfortable in the drain pipe and had a snack.
I get a kick out of his little hands and feet.
Enough nature...on to the card.
Creating My "Stork Making Delivery" Baby Card
- Final Card Size: 6" tall x 5" wide
- Tools: scissors, ruler, blending stumps, Making Memories paper cutter
, Martha Stewart scoring board
, circle cutter, Rubber Stampede stork stamp, piercing tool, sponge pieces
- Materials: cardstock, scrapbook paper, cover stock, mini brad, foam dimensional, Prismacolor pencils
, gamsol, adhesive, Colorbox inks
, Stazon ink
- You can purchase this card in my Polished Moxie Etsy Shop: Stork Making Delivery Baby Card
Card Front
I scored white cardstock for my base card and layered it with a light blue cardstock. To add interest to the front panel I affixed a half round of paper with a tweed type pattern on it.
The next component I worked on was the image that I stamped on white cardstock and colored using Prismacolor pencils and gamsol. I matted the image on a yellowed orange cardstock. The patterned paper I selected for my card had a coordinating paper with a variety of patterned clouds on it. It was perfect for my touch of whimsy. I cut out several clouds and affixed them to the image so that the stork is flying above them. I sponged dark yellowed orange ink around the matted image to add depth and affixed it to the front of the card.
To complete my vision of the stork flying through the sky I added a circle of yellowed orange cardstock with ink sponged around the edge to represent the sun. I topped it off with another set of clouds floating by the sun.
For the front sentiment I created a banner with "Congratulations" printed on it and sponged the edges with ink. I popped a foam dimensional in the center of the banner, affixed the right side with adhesive, and attached the left side with a mini brad the same color as the sponged ink. This gives the illusion of movement in the banner and completed the front of my card.
Angle Views of Card Front to Show Dimension
From the pictures above you can see that the only dimensional element on the face of the card is the sentiment banner.
Inside Card
For the inside I printed "You have a brand new reason to smile" on light blue cardstock and adorned it with a set of clouds I cut out from my patterned paper. Very simple, but carries the whimsical feel from the front of the card.
I constructed a coordinating envelope from heavy cover stock and decorated the lower left hand corner with another set of whimsical clouds.
Final Card and Envelope Combo
I achieved the whimsical look I was after and really like the stamp I used for the card.
You can purchase this card in my Polished Moxie Etsy Shop: Stork Making Delivery Baby Card
Card Recipe Specifics
- Cardstock: Wausau, Hammermill
- Cover Stock: Staples
- Scrapbook Paper: DCWV
- Ink: Colorbox
, Stazon black
- Prismacolor Pencils
: sunburst orange, spanish orange, warm grey 90%, cool grey 50%, cloud blue, sky blue light, powder blue, light peach, peach, pink rose
- Stamp: Rubber Stampede
- Tools: scissors, ruler, blending stumps, Making
Memories paper cutter
, Martha Stewart scoring board
, circle cutter, piercing tool, sponge pieces
- Misc: mini brad, foam dimensional, gamsol, adhesive
Thank you for visiting my blog and I hope you come back soon!
Page Content © 2011 Polished Moxie Concepts and Designs


No comments:
Post a Comment
Thank you for taking the time to leave a comment. I welcome and appreciate all comments.