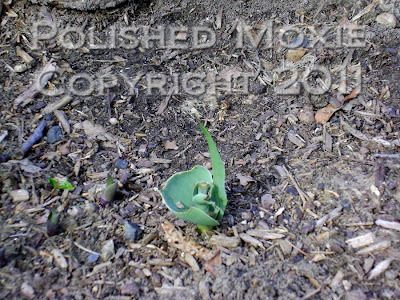
Speaking of springtime...what's wrong with this picture below?
Look at the two pictures that follow for a hint.
Did you have an "aha" moment when comparing the photos? The tulips we planted last fall are missing in the first photo. Upon further inspection this is what I found.
The deer have chomped all of my tulips up the drive away from the street. Tulips near the road have been ignored by the deer and I expect this is because of the traffic. My husband just laughs and says "You wanted wildlife and you've gotten wildlife!" We think the wildlife consider my gardens to be their gourmet salad buffet for their nightly dinner. This fall we'll move all of the tulips to the foot of the drive and replace them with daffies. After all, I do love my wildlife.
Creating My "Robins in Springtime" Card
Card Statistics
- Final Card Size: 6.25" wide x 5" tall
- Tools: Martha Stewart scoring board
, Studio G stamps, Making Memories paper cutter
, blending stumps, scissors, ruler, sponge pieces, iron, Darice heat gun
, embossing ink pen
- Materials: cardstock, cover stock, adhesive, Stazon ink
, Colorbox inks
, gamsol, Prismacolor pencils
, clear embossing powder, scrap white paper
- You can purchase this card in my Polished Moxie Etsy Shop: Robins in Springtime Card
Card Front
When I said I selected a bright color palette I wasn't kidding! I created the card base from a neon green cardstock and set it aside. For my front image I first stamped several whimsical elements on cream cardstock using black ink. I colored the images using gamsol and Prismacolor pencils. To protect the colored images while I worked on the background, I used an embossing ink pen on each image and covered them with clear embossing powder that I heat set.
The background is created by sponging on the various elements of grass, sky, and sun with several inks. After the background ink dried, I elected to iron off the clear embossing powder from my images as opposed to leaving it in place. To remove the embossing powder I placed a clean piece of white typing paper over the images and pressed a hot iron on it. This melted the embossing powder from the images and set it on the white paper. Removing the embossing powder muted the color of the images slightly.
To complete the front panel I matted the image scene with neon yellowed orange and neon yellow cardstocks. I affixed the matted image to the front of my card base.
Angle Views of Card Front to Show Dimension
The pictures above show that there are no dimensional elements on the front of my card. I elected to keep the card simple and focus on the scene created with my stamping and sponging.
Inside Card
For the inside panel I stamped a vase of flowers and a butterfly in the lower right hand corner of cream cardstock. I colored them using gamsol and Prismacolor pencils. To complete the panel I sponged color around the vase of flowers and sponged a sun in the upper left corner. I affixed the completed panel to the inside of my card base.
I also constructed a coordinating envelope from heavy cover stock and sponged an abstract sun in the lower left hand corner. I sprayed the sun with sealer to protect it as it travels through the mail system.
Final Card and Envelope Ensemble
Bright and cheery is what I wanted...and bright and cheery is what I got...at least I was cheered upon completing my card.
You can purchase this card in my Polished Moxie Etsy Shop: Robins in Springtime Card
Card Recipe Specifics
- Cardstock: Staples, Wausau
- Cover Stock: Staples
- Stamps: Studio G
- Ink: Stazon black
, Colorbox
- Prismacolor Pencils
: orange, chocolate, dark brown, canary yellow, lavender, crimson lake, pink, pale vermillion, spring green, chartreuse, jasmine, warm grey 90%, french grey 90%
- Tools: scissors, ruler, blending stumps, sponge pieces, Martha Stewart scoring board
, Making Memories paper cutter
, Darice heat gun
, iron
- Misc: gamsol, adhesive, spray sealer, scrap white paper, clear embossing powder, embossing ink pen
- Techniques: stamping, gamsol, sponging
Thank you for visiting my blog and I hope you come back soon!
Page Content © 2011 Polished Moxie Concepts and Designs


What a bright, cheerful card. Made me smile.
ReplyDeletefound your blog on the MCC coloring 101 site
GinaA
I love your cute little Robin card! I feel your pain when it comes to gardening and wildlife. Two years ago the deer got to our yews so this past winter we put wire over them. I still have some adorable bunnies who love to snack on my perennials.
ReplyDeletevery cheery card!
ReplyDeleteThat's too bad about your tulips, but at least they left some pretty flowers for everyone to see :) Deer have to eat too :)
ReplyDeleteI like your pretty card with all of those beautiful sponged colors! Don't look now, but I think the sun actually made an appearance for a couple hours late today! SHhhhhh, don't tell Mother Nature :)
Love the bright cheeriness! And those little birds are just so cute!
ReplyDelete