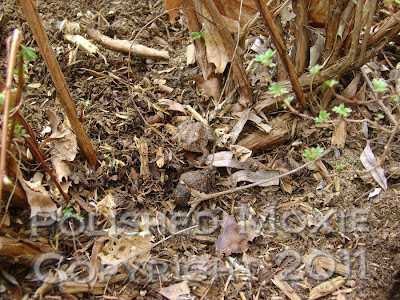
Before getting into my card, I want to show you a little friend I saw in my garden while I was working in it this past week.
Can you spot him below the arrow? He's difficult to see because he melds into his surroundings. For such a little guy, he scared the be-jiggers out of me when I was clearing the debris in the area. Here's a closer look at him.
He's not much bigger than the acorn in front of him. Doesn't he just blend into the background? Here are a couple of pictures with even closer shots of him.
Needless to say, I worked quickly in this area after meeting him and was careful not to squash him.
Creating My "I Love You Teddy Bear Card in Pink and Burgundy"
Card Statistics
- Final Card Size: 6" tall x 5.25" wide
- Tools: Martha Stewart scoring board
, PSX teddy bear stamp, Fiskars paper crimper
, Making Memories paper cutter
, blending stumps, scissors, ruler, sponge pieces
- Materials: cardstock, scrapbook paper, cover stock, buttons, adhesive, Stazon ink
, Colorbox inks
, gamsol, Prismacolor pencils
, white gel pen, black gel pen, spray sealer
- You can purchase this card in my Polished Moxie Etsy Shop: I Love You Teddy Bear Card in Pink and Burgundy
Card Front
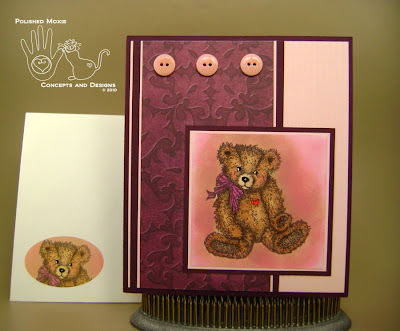
I created the card base from burgundy cardstock and set it aside. For the front panel I ran a piece of pink cardstock through my paper crimper to give it some texture. I added interest to this textured panel with a multiple layered strip consisting of burgundy cardstock, pink cardstock, and a burgundy patterned paper.
I stamped the teddy bear image in black ink on white cardstock and colored him using gamsol and Prismacolor pencils. To add depth to the image I sponged several inks around Teddy. As a finishing touch I used a black gel pen to define Teddy's eyes, nose, and mouth. To add more character to his face I placed highlights in his eyes and on his nose with a white gel pen. I matted the colored image on pink and burgundy cardstocks and affixed it to the front panel.
Here's a close up of Teddy.
To complete the front panel I added three pink buttons and affixed the panel to the front of the burgundy card base.
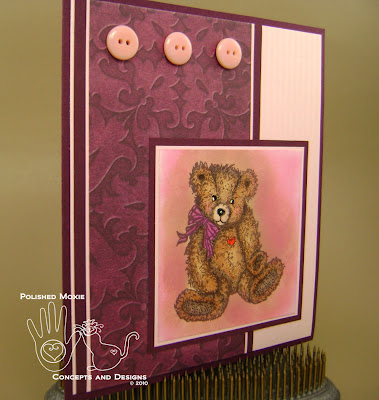
Angel Views of Card Front to Show Dimension
Note that the only real dimensional elements on the front of the card are the buttons and textured pink cardstock. The sponging I did around Teddy gives the illusion of dimension.
Inside Card
For the inside panel I printed "I Love You Bear-y Much" in burgundy ink on pink cardstock. I adorned the lower portion of the panel with a multiple layered strip consisting of burgundy cardstock, pink cardstock, and patterned paper. I affixed the completed panel to the inside of my card base.
I also constructed a coordinating envelope from heavy cover stock and printed Teddy's sweet face in the lower left hand corner. I sprayed the image with sealer to protect it as it travels through the mail.
Final Card and Envelope Ensemble
I think the card turned out very feminine and rich looking.
You can purchase this card in my Polished Moxie Etsy Shop: I Love You Teddy Bear Card in Pink and Burgundy
Card Recipe Specifics
- Cardstock: Hammermill, Wausau
- Cover Stock: Staples
- Scrapbook Paper: Provo Craft
- Stamp: PSX
- Ink: Stazon black
, Colorbox
- Prismacolor Pencils
: crimson red, peach, light peach, beige, chocolate, dark umber, light umber, dark brown, chestnut, terra cotta, black cherry, metallic purple
- Tools: scissors, ruler, blending stumps, sponge pieces, Fiskars paper crimper
, Martha Stewart scoring board
, Making Memories paper cutter
- Misc: gamsol, adhesive, buttons, white gel pen, black gel pen, spray sealer
- Techniques: stamping, gamsol, sponging
Thank you for visiting my blog and I hope you come back soon!
Page Content © 2011 Polished Moxie Concepts and Designs


So many wonderful teddy bear cards I don't know which is my favorite. I love your pink and burgundy color scheme too - very romantic.
ReplyDelete