 |
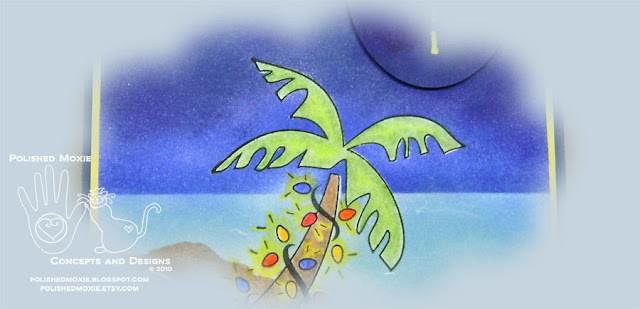
| Section of my handmade palm tree Christmas card |
Now you may be wondering what inspired me to make a Christmas card with a palm tree as its focal point especially since I live in the Northeast US. Well, it was our October surprise. And what was my October surprise you may ask. This...
 |
| Overlooking bird feeders one hour into an October snowstorm |
Yep, a snowstorm. This is one hour into the snowstorm and look at that snow coming down and what is already on the ground. Here's another view overlooking another part of my garden.
 |
| Overlooking garden one hour into an October snowstorm |
You will notice that there are still loads of leaves on them there trees and bushes...not good. This storm hit before we had even reached our peak leaf peeping weekend. Two hours later and this is what I saw when I looked out my window.
 |
| Overlooking bird feeders 3 hours into an October snowstorm |
 |
| Overlooking garden 3 hours into an October snowstorm |
Look how much wet and heavy snow has piled up. Poor drooping bushes and trees. Two hours later (five hours into the storm) we were seeing this...
 |
| Tree bending to ground 5 hours into an October snowstorm |
Trees everywhere were bowing to the ground. You could hear branches popping and thuds as branches and trees broke and hit the ground. We had several trees break and the next picture is an oak that came down in our yard.
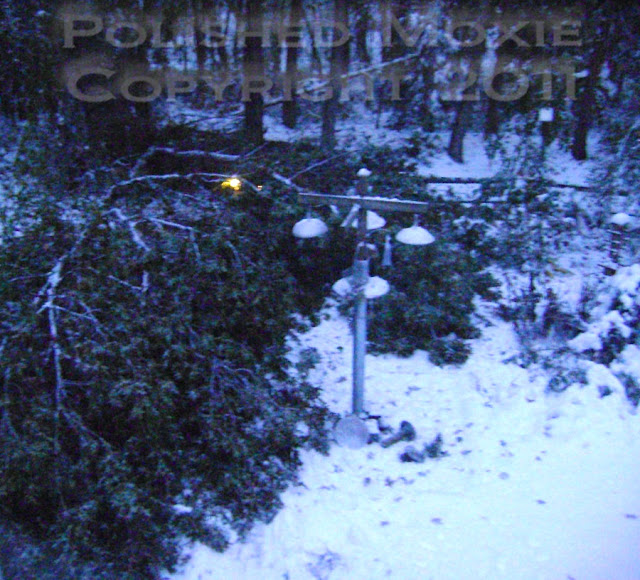 |
| Tree fell during October snowstorm right at dusk |
This is a large oak tree branch that we saw bending and happened to actually watch it fall. It hit my bird feeders and knocked many of them down, but lucky for us it missed the house and the bird feeders survived their trauma. The tree branch fell right at dusk (you can see one of our night garden lights shining in the picture). I actually had my night critter cam running and caught the whole thing on video. You can even see a little bird fly out of the tree as it's falling. On the video you see bark starting to come down from the sky, then a big whoosh of snow as the tree falls. Too bad my critter cam doesn't have sound. I'll try to get the video up sometime this week.
From the picture you don't have a good perspective of how big this tree branch really is. My husband bundled up and braved the storm to rescue my bird feeders and check out the tree. I got a picture with him in it. He's over 6 feet tall.
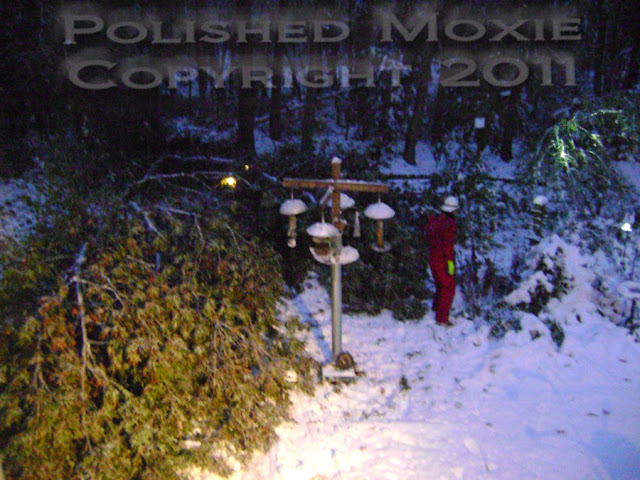 |
| Perspective as to how big the fallen tree is |
Big tree with lots of leaves and this is just one of several we lost. You can see that one of our outdoor spotlights has turned on lighting up the tree.
It didn't look any better early the next morning (6 a.m.) after 15 inches of snow had fallen in October!!!!
 |
| Fallen tree the morning after 15 inches of snow |
The light is dim because of the earliness of the day and the snow is pretty flattened in this picture because of all of the deer and critter prints.
So, this was the inspiration for my palm tree Christmas card. I kept looking out my window watching the snow come down, seeing it pile up, and remembering last winter season (oh my aching back). Thoughts of warm tropical beaches kept flitting through my head, so I made my Christmas card based on that fantasy.
Handcrafting My Palm Tree Christmas Card
Card Statistics
- Final Card Size: 5.5" tall x 4.25" wide
- Tools: blending stumps, palm tree stamp, Christmas lights stamp, Christmas star stamp, oval die, heat tool, scoring board, paper cutter, anti static bag, Cuttlebug machine, sponge pieces, computer, ruler
- Materials: cardstock, cover stock, adhesive, embossing powder, inks, artists tape, colored pencils, gamsol, gel pen
- This Card is Available in My Polished Moxie Etsy Shop: Palm Tree Christmas Card
Front View of Handmade Palm Tree Christmas Card
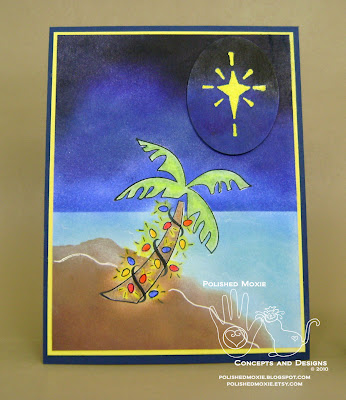 |
| Front of my handmade palm tree Christmas Card |
To begin my handmade palm tree Christmas card I cut and scored navy blue cardstock for my base card so that my card opens vertically from the bottom.
For the beach scene on my front card panel I started by stamping the palm tree decorated with Christmas lights on white cardstock and a piece of artist's tape. I used Stazon ink to stamp both images. I colored my image on the white cardstock using gamsol and colored pencils. To protect my colored palm tree image while I sponged on my background, I fussy cut out the image that I had stamped on the artist's tape and used it as a mask. Because the artist's tape is low tack it does not damage my colored image. I fussy cut the tape image just inside the black stamped edge so that I didn't get a halo effect around the palm tree when I removed the tape after I finished sponging the background.
To create my background I tore a large curved piece from the corner of a square piece of scrap cardstock so that I had two pieces of cardstock (the curved corner piece and the remainder of the square with the corner torn out). I used the square with the missing corner to create my beach and mask the remainder of the panel. The missing portion of the square is my beach so I positioned it where I wanted my beach. Keep in mind at this point my colored palm tree is masked with its artist's tape image. Using several shades of brown ink I sponged in my beach.
For the ocean I masked my sponged beach with the piece of cardstock that I had torn from the square. This is the same shape as my beach and protects it while I sponge the ocean. I place the mask so that just a tad of the beach edge shows all along it. Next I determined where I wanted my horizon and used one of the straight edges of my torn square to form the horizon with the rest of the square masking the upper part of my panel where the sky resides. The area between the masked beach and the straight edge of the square is my ocean. I sponged several shades of light blue inks in this region to create my ocean.
Once my ocean is completed I flip the square mask downward so that a straight edge is still along the horizon I just created, but the remainder of the square covers the lower portion of my card panel and unmasks the area for my sky. I position the straight edge of the square so that a tad of my ocean shows all along the horizon line. Now I sponge in my sky with ink starting at the horizon with my lighter shades of blue and working up the sky with darker shades of blue and a touch of black at the top.
At this point I remove my cardstock masks and use a white gel pen to create waves in my ocean. I start by creating the white line all along the beach representing water coming onto it. Then I add waves and ripples to the ocean with the white gel pen and smudge them with my finger. This gives a translucent effect to the water on the beach and the illusion of distant waves and illumination from the Christmas star that I will put in the sky. With this step completed I remove the artist's tape from my palm tree and save it for another time. This completes my front Christmas scene with the exception of my Christmas star. I matted this scene with yellow cardstock and affixed it to my card base.
For my Christmas star I wanted to add interest and dimension to the card so I decided to pop a panel from the front with the star on it. I stamped the star on an oval of white cardstock using yellow pigment ink and then embossed it with clear embossing powder. I determined where I wanted to place my star in the sky and then sponged color on the oval to match that portion of the sky. When the ink was dry I ironed off the embossing powder by placing a piece of scrap typing paper over the top of it and heating it with a hot iron. I popped the finished Christmas star element onto the sky with silicone glue so that it is slightly raised from the surface of the card. This completed the front of my palm tree Christmas card.
Angle Views of Handmade Palm Tree Christmas Card
 |
| My handmade palm tree Christmas card set at right angle |
 |
| My handmade palm tree Christmas card set at a left angle |
These angle views of my palm tree Christmas card show you the dimensional element of the Christmas star.
Inside Panel of Handmade Palm Tree Christmas Card
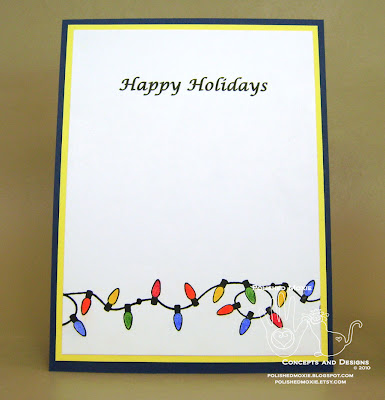 |
| Inside my handmade palm tree Christmas card |
I kept the inside panel of my palm tree Christmas card relatively simple. I printed "Happy Holidays" on white cardstock and stamped a string of Christmas lights along the lower edge. Using colored pencils and gamsol I colored the lights. To complete the card panel I matted it with yellow cardstock and attached it to my card base.
I also constructed a handmade envelope from heavy cover stock to compliment my palm tree Christmas card. To decorate it I stamped a string of Christmas lights along its lower edge and colored them using gamsol and colored pencils. I sprayed the image with sealer to protect it.
Final Handmade Palm Tree Christmas Card and Envelope Ensemble
 |
| My handmade palm tree Christmas card and its coordinating envelope |
I have to say I was feeling the warmth when I finished this card. Too bad it had not melted all of the snow that awaited me outside.
My handmade palm tree Christmas card and its coordinating envelope are available in my Polished Moxie Etsy Shop: Palm Tree Christmas Tree.
Card Recipe Specifics
- Cardstock: The Paper Company, Wausau
- Cover Stock: Staples
- Die: Nestabilities classic ovals small
- Stamps: Studio G (palm tree and star), Recollections (Christmas lights)
- Inks: Stazon (black), Colorbox Fluid Chalks (browns and blues), Colorbox Pigments (blues, yellow, black), Delta embossing ink
- Embossing Powder: Stamp 'n Stuff
- Colored Pencils: Koh-I-Noor (8750/19 light green, 8750/4 dark green, 8750/13 dark yellow, 8750/6 blue, 8750/10 fuchsia, 8750/23 dark brown, 8750/11 light brown, 8750/9 orange, 8750/1 bright yellow)
- Tools: Darice heat tool, Martha Stewart scoring board, Making Memories paper cutter, Cuttlebug machine, anti static bag, blending stumps, sponge pieces, ruler, computer
- Misc: Pro artist's tape, adhesives (YES, silicone), Signo white gel pen, Krylon spray sealer, gamsol
- Techniques: sponging, gamsol, fussy cutting, masking, die cutting
Thank you for visiting my blog and allowing me to share my handcrafted items with you. I hope you enjoyed your visit and will come back soon!
Page Content © 2011 Polished Moxie Concepts and Designs


No comments:
Post a Comment
Thank you for taking the time to leave a comment. I welcome and appreciate all comments.