 |
| Peek at My Handmade Floral Thank You Card |
I'm finally back to sharing my handmade cards with you. Today I am revealing a very clean and simple handcrafted thank you card. The focal point of the card is a floral silhouette beneath a thank you banner. I selected colors for my handmade card based upon a beautiful sunrise my husband captured with the camera. Although my homemade thank you card appears very simplistic, I used many techniques to create it. These techniques include sponging, brayering, stamping, die cutting, dry embossing, decoupage and chalking. I also incorporated a little digital technique. As you can see, I love incorporating all sorts of things in the design of my handmade cards. The inside of my thank you card is as clean and simple as the outside...I left it blank.
Inspiration for My Handmade Floral Thank You Card
When I see a beautifully colored sky at sunrise or sunset, I think about my Mom. She loved the beauty of nature and working in her garden. I wanted to create a handmade thank you card that captured these two aspects of Mama, yet was simple in design. As it happens, my husband captured this beautiful sunrise and I used it as inspiration for my thank you card.
 |
| Brilliant Red-Orange Sunrise |
 |
| Beautiful Deep Orange Sunrise |
As I looked at these sunrise pictures the black silhouettes of the flag and trees against the deeply colored sky really stood out to me. I used this concept for my thank you card. I created a background reflecting the sunrise and selected a silhouetted flower as the main image. Both remind me of Mom.
I have shared other handmade cards that I've used a sunset or sunrise background for the main image. They have a variety of color schemes and I used different techniques to create them. Details on those cards can be found on my posts Silhouettes on Watercolor Sunsets, Silhouettes in the Sunset and Desert Sunset.
The World Around Me
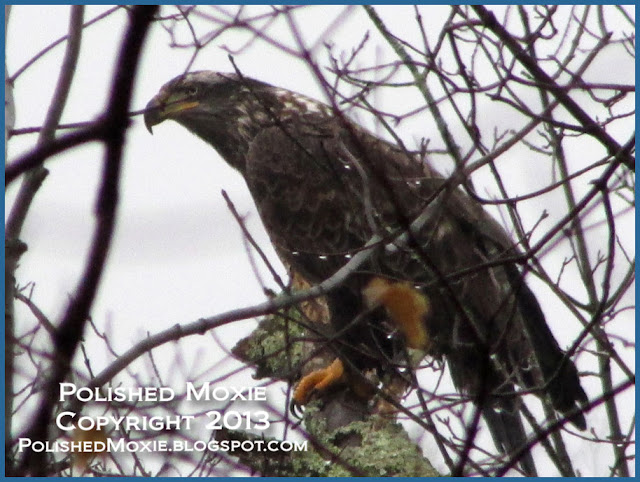
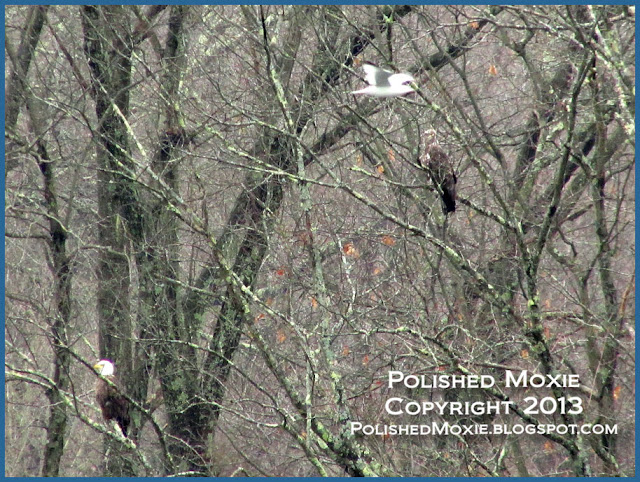
This is the first handcrafted thank you card that I have shared with you. As I designed this card, I thought about some of the little things that brighten my day when I am blue and I am thankful for. One thing that always makes me smile is taking a drive along the river and looking at the wildlife. I am particularly thankful for the bald eagles that we often see, especially during the winter months. They are such gorgeous birds that I really enjoy watching, so I thought I would share several pictures of these magnificent creatures. We captured these photos on some of our drives along the river.
 |
| Adult Bald Eagle High in a Tree |
 |
| Close Up of Adult Bald Eagle High in a Tree |
 |
| Immature Bald Eagle High in a Tree |
 |
| Immature Bald Eagle Overlooking a River |
 |
| Immature Bald Eagle Looking Across a River |
 |
| Adult and Immature Bald Eagles Perched in Trees with Seagull Flying Past |
 |
| Adult Bald Eagle Perched Among Branches in a Tree |
 |
| Immature Bald Eagle Perched Among Branches in a Tree |
 |
| Adult Bald Eagle in the Snow |
 |
| Adult Bald Eagle Perched in a Snowy Tree |
 |
| Immature Bald Eagle Flying Above River |
 |
| Adult Bald Eagle Fishing in a River |
Aren't these majestic birds just the best eye candy!
My Love of Papercrafting Challenges
I follow many challenge blogs and my handmade Floral Thank You card reflects the following challenges:
- The Sisterhood of Crafters challenge is to create a thank you card.
- Make it Monday is a link party and I have linked my floral thank you card to it. I also checked out several of the cards linked to MIM and found this cute and funny chicken card on the Love to Make Cards blog that I thought you might enjoy viewing.
- The Shabby Tea Room challenge is to use a silhouette as the focal point of your project. I used a lily of the valley flower silhouette on my handmade thank you card.
- Through the Craftroom Door challenge is anything goes and I submitted my floral thank you card to it.
- Tuesday Throwdown is anything goes this week so I submitted my silhouette thank you card to it.
Handcrafting My Handmade Floral Thank You Card
Card Statistics
- Final Card Size: 5.5" tall x 4.25" wide
- Tools: flower silhouette stamp, shaped dies, scoring board, paper cutter, scissors, ruler, sponge pieces, Cuttlebug machine, non stick craft mat, computer, brayer, adhesive tape runner
- Materials: cardstock, glossy, cardstock, photo paper, cover stock, tape adhesive, silicon adhesive, pva adhesive, inks, spray sealer, chalk
- Card can be Purchased in My Polished Moxie Etsy Shop: Floral Silhouette Thank You Card
Front Panel of My Handmade Floral Thank You Card
 |
| Front Angled Right - My Handmade Floral Thank You Card |
To create my floral thank you card I started by creating the brayered panel for my silhouette flower stamp. Using a rainbow ink pad in colors similar to that of the sunrise on my inspirational photo, I brayered the ink onto a piece of glossy cardstock. When the ink was dry, I scanned the inked cardstock into my computer and printed it out on photo paper. I did this so that I can use the brayered background in other projects.
Next I constructed the image panel for my thank you card. Using black ink I stamped the flower on it. After the ink dried I die cut my image panel into a shape I found pleasing for the flower silhouette. I next created a separate sponged panel background for my image panel.
Taking a piece of peach cardstock I sponged on the various colors from the rainbow ink pad using small pieces of sponge. When the ink was dry I cut it to size and affixed my image panel to it using silicon adhesive so that the image panel was popped from the surface.
For the thank you sentiment of my handmade card I printed "Thank You" on cream cardstock with my computer. I used a die cut to create the banner for my sentiment and dry emboss it. To finish off the sentiment I chalked around its edges with a peach pearlescent chalk to give it depth. I like the dimensional aspect of the dry embossing and chalking. Once I completed my thank you sentiment banner, I affixed it to my image with silicon glue to pop it from the surface.
With the completion of the front topper panel of my thank you card, I created the base card using a rust-orange cardstock. I scored the cardstock so that my handmade card opens vertically from the bottom to form a tent card. I affixed the topper panel to my card base using my tape runner.
Here's another picture of my floral silhouette thank you card from a different angle.
 |
| Front Angled Left - My Handmade Floral Thank You Card |
In the above photo you can see the dimension added by the popped elements and the chalking. It's a very clean and simple design. The variegation in color of the image panel is difficult to see. Here's a closer look at it which shows the gradual change in color down the panel a little better.
 |
| Image Panel - My Handmade Floral Thank You Card |
Inside Panel of My Handmade Floral Thank You Card
 |
| Inside Panel - My Handmade Floral Thank You Card |
I kept the inside of my thank you card very simple. I constructed a panel from cream cardstock and decorated it with a strip of the sponged peach cardstock. With the card panel completed, I affixed it to the inside of my card base.
I also constructed a handmade envelope from heavy cover stock. I stamped the flower silhouette in orange on the lower left hand corner of the envelope. To protect the envelope image I sprayed it with sealer.
Final Handmade Floral Thank You Card and Handmade Envelope Set
 |
| My Handmade Floral Thank You Card and Handmade Envelope Set |
I used many techniques to create this card set and enjoyed every minute of it.
This card set is available in my Polished Moxie Etsy Shop: Floral Silhouette Thank You Card
Card Recipe Specifics for Handmade Floral Thank You Card
- Cardstock: Wausau, Hammermill, Recollections
- Cover Stock: Staples
- Photo Paper: Ocean State
- Stamp: Flourishes summer botanicals
- Dies: Spellbinders Nestabilities labels 8, Spellbinders Shapeabilities ribbon banners
- Inks: Stazon jet black, Kaleidacolor desert heat, Colorbox orange
- Chalk: Pebbles Inc pearlescents
- Tools: tape runner, scoring board, paper cutter, scissors, ruler, sponge pieces, computer, Cuttlebug machine, non stick craft mat, brayer
- Misc Material: silicon adhesive, tape adhesive, pva adhesive, spray sealer.
- Techniques Used: die cutting, stamping, dry embossing, digital stamping, brayering, chalking, decoupage
So ends another jaunt along my handcrafting card journey with my handmade floral thank you card. A unique card based upon a deep red-orange sunrise and fit for any occasion requiring a note of gratitude. Thank you for visiting my blog and allowing me to share my handmade thank you card and photography with you. I hope you enjoyed your visit and will come back soon!
Don't forget to show a little "Moxie" love and hit the Polished Moxie like button on my sidebar or to the right of the Polished Moxie logo below :)
Don't forget to show a little "Moxie" love and hit the Polished Moxie like button on my sidebar or to the right of the Polished Moxie logo below :)
Page Content © 2013 Polished Moxie Concepts and Designs


wow, what a stunning card!
ReplyDeleteenjoy *~*
Fab card - this is simply stunning.
ReplyDeleteThanks for joining us at Tuesday Throwdown for our anything goes challenge. Hope you can stop by and join us again soon!
Hugs
Julie x
That is an awesome card. Love the silouhette and the red. ♥ it. Thanks so much for playing along with us in The Sisterhood of Crafters.
ReplyDeletePS: Nice shots of the eagles.
Wonderful inspiration and BEAUTIFUL creation! Thanks so much for joining us at The Sisterhood ‘THANK YOU’ challenge and please come back again soon!
ReplyDeleteDarlene
one of the 'Sistahs'
DAR’S CRAFTY CREATIONS