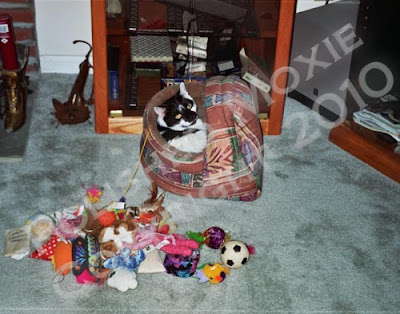
First, let me share a picture of Bingo with you. I have his toys stored in an old cat bed that he and Gracie never used. Now Bingo spends a lot of time digging through his "toy box" and pulling out various toys to entertain himself. I'm always picking up toys about the house and putting them back into his toy box when too many of them are lying around. To my surprise, on this particular day Bingo dumped all of his toys out onto the floor and crawled into the cat bed. Here's a picture of the aftermath.
What a cutie!
Now down to the business of sharing two birthday cards.
The Making of a Hogwash Pig Birthday Card
Card Statistics
- Final Card Size: 5.5" tall x 4.25" wide
- Image Size: 2" x 2"
- Tools: paper cutter, circle cutter, blending stumps, Martha Stewart scoring board
, Martha Stewart drippy goo punch
- Materials: cardstock, cover stock, scrapbook paper, adhesive, ink pads, double sided foam squares, gamsol, Prismacolor pencils
, spray sealer
- You can purchase these cards from my Etsy shop: Hogwash Pig Birthday Card in Stripes and Hogwash Pig Birthday Card in Plaid
Card Front and Coordinating Envelope
This card began with a card base cut and scored from cream colored cardstock. The front panel of the card is lavender cardstock layered with pink paper on the top half of the panel and pink plaid paper on the lower half of the panel. Note that the plaid paper also has lavender and cream stripes running through it that match the cream and lavender cardstocks. A strip of the cream cardstock and a strip of the pink paper were punched to resemble dripping mud. They are layered together with the pink on top slightly offset from the cream cardstock. This layered strip is affixed across the panel over the seam where the plaid and pink papers meet.
One of the pig images on the stamp was inked with brown ink and stamped on ivory artist paper. It was colored using Prismacolor pencils and gamsol. The completed image was matted with lavender cardstock and affixed to the front panel. I used the same pig and coloring technique on the envelope made from heavy cover stock to coordinate with the card. The envelope image was sprayed with sealer to protect it for transit through the mail system.
"Hogwash" is printed in brown ink on a round of cream cardstock and matted on a round of lavender cardstock. This creates the front sentiment and it was affixed to the front panel using dimensional foam squares.
Angle View of Card Front to Show Dimension
This view of the card shows that the front sentiment is raised slightly above the surface of the card. You can also see the added dimension of the punched drips across the card.
Card Inside
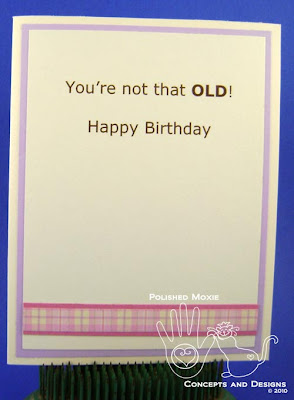
For the inside panel, I used cream cardstock printed in brown ink with "You're not that OLD! Happy Birthday". This sentiment panel was embellished with a layered strip of the pink and plaid papers. It is matted with lavender cardstock and affixed to the inside of the card base.
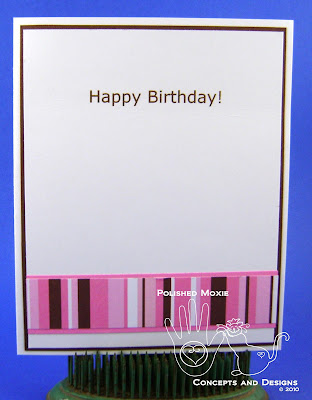
I made a second card very similar to the one above, however, I used a striped paper in place of the plaid paper and a different color scheme based upon the striped paper. A different pig image was used from the stamp. Also, the front sentiment was altered to "Hogwash...You're not That Old!" and the sentiment inside the card is simply "Happy Birthday!"
Pictures of the Second Card
I think both of these birthday card turned out quite cute.
These card and envelope ensembles can be purchased from my Etsy shop: Hogwash Pig Birthday Card in Stripes and Hogwash Pig Birthday Card in Plaid
Tidbit of wisdom from the experience: When you design a card sketch you like, it can be used many times to create a variety of cards in different themes or in the same theme, but different colors.
Card Recipe Specifics
- Cardstock: Wausau, Recollections, Hammermill
- Cover Stock: Staples
- Printed Scrapbook Paper: Plaid - Hot Off the Press; Striped - DCWV
- Stamp: DRS Designs
- Inks: Stazon timber brown
- Prismacolor Pencils
: chocolate, dark umber, blush pink, raspberry, pink, beige, light peach
- Punch: Martha Stewart drippy goo
Thank you for visiting and I hope you come back soon!
Page Content © 2010 Polished Moxie Concepts and Designs


No comments:
Post a Comment
Thank you for taking the time to leave a comment. I welcome and appreciate all comments.