The Making of My "Teddy Bear and Roses Birthday Card"
Card Statistics
- Final Card Size: 5.5" square
- Tools: Martha Stewart scoring board
, PSX teddy bear stamp, Making Memories paper cutter
, blending stumps, scissors, EK Success Curvy Circle Cutter
, ruler, sponge pieces
- Materials: cardstock, scrapbook paper, cover stock, grosgrain ribbon, buttons, adhesive, Stazon ink
, Colorbox inks
, gamsol, Prismacolor pencils
, black gel pen, white gel pen, foam dimensionals, spray sealer
- You can purchase this card in my Polished Moxie Etsy Shop: Teddy Bear and Roses Birthday Card
Card Front
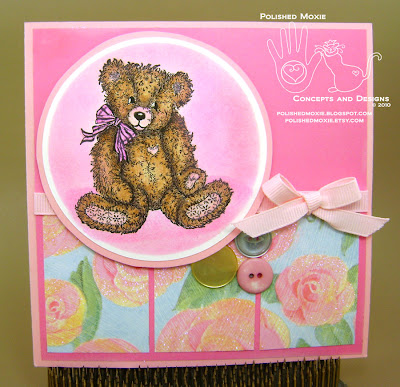
I scored pastel pink cardstock for the card base and set it aside. For the front panel I cut a piece of the sparkly rose scrapbook paper into three sections and affixed them to a dark pink paper. I added a piece of light pink grosgrain ribbon along the top edge of the rose paper sections. The sparkle in the roses is a little difficult to see in this picture.
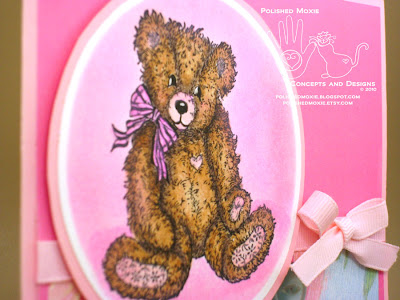
For the image I stamped the teddy bear in black ink on a round of white cardstock and colored him using gamsol and Prismacolor pencils. To add depth to the image I sat Teddy on a dark pink area and then sponged lighter pink around the edge of the white cardstock and him. I left the very edge of the white cardstock showing. As a finishing touch I used a black gel pen to define Teddy's eyes, nose, and mouth and topped them off with white highlights. I matted this image with light pink cardstock and affixed it to the front panel with foam dimensionals.
Here's a close up of Teddy.
To complete the front panel I added three different buttons that play off the color in the rose paper and a light pink grosgrain ribbon bow.
Here's a picture that shows the sparkle on the rose paper a little better.
Angle Views of Card Front to Show Dimension
The pictures above show you the different elements of dimension on the card front. You can see that the matted image is raised from the card surface and that the button trio and bow add elements of interest.
Inside Card
The inside panel is very simple. I printed "Happy Birthday" on white cardstock and adorned it with a layered strip consisting of the dark pink paper, light pink cardstock, and sparkly rose paper. To finish off the card I matted the sentiment panel with the dark pink paper and affixed it to the inside of the card base.
I constructed a coordinating envelope from heavy cover stock and printed Teddy encircled in pink on the lower left hand corner. I sprayed the image with sealer to protect it through the mail.
Final Card and Envelope Ensemble
As I stated in my previous post, I adore this teddy stamp and you'll be seeing it again in several cards in future posts.
You can purchase this card in my Polished Moxie Etsy Shop: Teddy Bear and Roses Birthday Card
Card Recipe Specifics
- Cardstock: Hammermill, Wausau
- Scrapbook Paper: K&Company, DCWV
- Cover Stock: Staples
- Stamp: PSX
- Ink: Stazon black
, Colorbox
- Prismacolor Pencils
: hot pink, blush pink, dark umber, chocolate, sienna brown, carmine red
- Ribbon: Michaels
- Tools: EK Success Curvy Circle Cutter
, Martha Stewart scoring board
, Making Memories paper cutter
, scissors, ruler, blending stumps, sponge pieces
- Misc: gamsol, foam dimensionals, adhesive, buttons, white gel pen, black gel pen, spray sealer
- Techniques: stamping, gamsol, sponging
Thank you for visiting my blog and I hope you come back soon!
Page Content © 2011 Polished Moxie Concepts and Designs


It looks great !
ReplyDeleteThere he is again - another sweet bear! I love your roses background paper. So pretty!
ReplyDelete