 |
| Peek at My Handmade Polar Bear Birthday Card |
Today I'm sharing a whimsical handmade polar bear birthday card with you. I have to admit that when I look through birthday cards, the colorful and whimsical ones call out to me. If they're amusing, that's even better. My polar bear birthday card falls into that category...whimsical and a smile maker. It features a comical polar bear sitting in the grass holding a red balloon. I selected the bright color scheme for my handmade card based upon a curl cascade ribbon I have. My card design is clean and simple on the outside and inside.
The nice thing about the image and design of my polar bear card is that it doesn't have to be used as a birthday card. It can be used for any happy occasion or just to say "hi."
Inspiration for My Handmade Polar Bear Birthday Card
 |
| Ribbon Inspiration for My Handmade Birthday Card |
I like the bright colors of this ribbon and the quirky nature of the bouncy spring curls. Such a simple ribbon design with a light-hearted, cheerful feel about it.
I decided to give my handmade birthday card a similar vibe as that of the ribbon. The image of the polar bear holding a balloon and the colorful polka dot paper fit the bill.
If you have visited my blog before, you know that I have used bears on a variety of cards. These cards include: a bear dancing in the spotlight card, a sleeping teddy bear baby card, a lace embellished teddy bear card, a teddy bear and roses birthday card, and I love you teddy bear cards in burgundy, teal and yellow. I guess I got my love of bears from my Mom who had quite a collection on them.
The World Around Me
The nice thing about working on a bright, colorful and happy card is that it takes your mind off of the terrible weather outside. We just survived the blizzard of 2013 with about 28 inches of snow in 24 hours. It took us 2 days to clear the snow and we have had a couple of snowstorms (including a nor'easter) since the blizzard. The snow keeps piling up, but I'm doing a happy dance now because we can finally relax a few days.
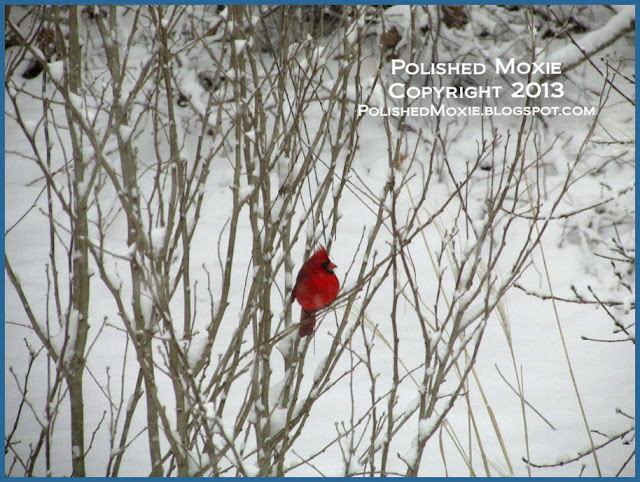
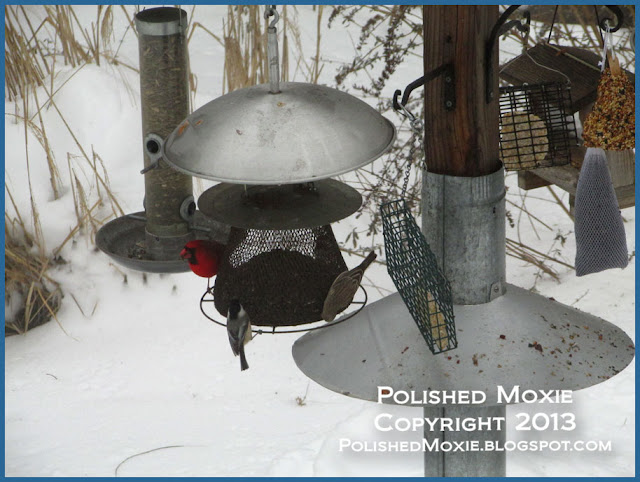
The birds are celebrating the fact that we cleared the bird feeding area and they have plenty of food to eat.
 |
| Cardinals and Finch in the Snow |
 |
| Cardinal on My Rose of Sharon |
 |
| Cardinal and Sparrow Peeking Out from the Snowy Butterfly Bush |
 |
| Variety of Birds Getting Food During the Snowstorm |
 |
| Trio of Birds Waiting for Space on the Hanging Feeders |
 |
| Variety of Birds Grabbing Food from the Ground |
 |
| Several Birds Trying Out the Different Menu Items |
 |
| Cardinal and Finch Having a Snack |
 |
| Two Cardinals Sharing a Meal |
 |
| Cardinal and Woodpecker Dinner Companions |
 |
| Sunflower Seeds are Popular with the Birds |
 |
| Diversity at the Bird Feeders |
 |
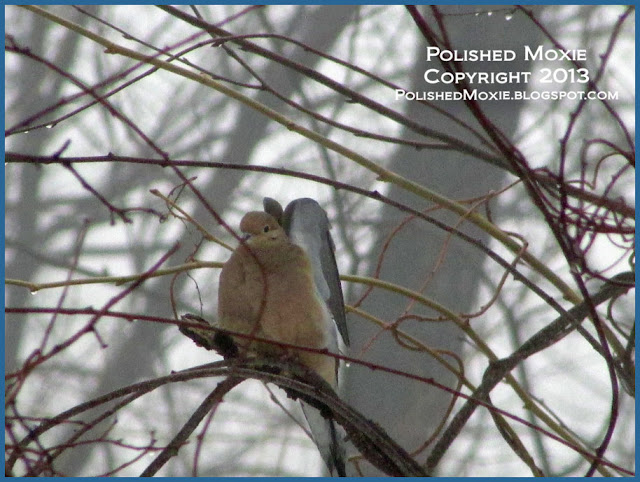
| Dove Stretching Her Wings After Sitting Awhile |
The last picture of the dove stretching her wings is how I feel after a long snowy day that I spent sitting in front of my computer or curled up in a chair reading. Doesn't she look like an angel?
My Love of Papercrafting Challenges
I follow many challenge blogs and my handmade Polar Bear Birthday card reflects the following challenges:
- Frosted Designs Challenge: Be Bold...use bold colors and bold patterns.
- Raise the Bar Challenge: Anything goes.
- Crafts 4 Eternity Challenge: Feature a bear.
- QKR Stampede Challenge: Anything goes.
- Whimsical Designs Challenge: Include the color green.
- Make It Monday (MIM): Anything goes. I also saw this cute card in the MIM gallery for this week.
- Gingerloft Challenge: The color red.
- Little Red Wagon Challenge: Feature a teddy bear. I decided to make my bear white instead of brown.
- Flourishes Timeless Tuesday Challenge: Use red.
- MilkCoffee Challenge: Make it cute. My polar bear is soooooo cute.
- ABC Challenge: H is for Happy Birthday.
- Card Makin' Mamas Challenge: Card for a birthday.
- Here Come the Boys Challenge: Lots of layers. My card has 6 layers.
- Creative Card Crew Challenge: Birthday.
- Oldie But a Goodie Challenge: Bright Colors and use something at least 6 months old. The ribbon on my polar bear card has been in my stash for way over 6 months.
- Digistamps4Joy Challenge: Birthdays are fun.
Handcrafting My Handmade Polar Bear Birthday Card
Card Statistics
- Final Card Size: 5.5" tall x 4.25" wide
- Tools: polar bear stamp, rectangle dies, scallop die, scoring board, paper cutter, scissors, ruler, blending stumps, computer, Cuttlebug machine, non stick craft mat, tape runner, Photoshop Elements
- Materials: cardstock, designer paper, cover stock, tape adhesive, silicon adhesive, pva adhesive, gamsol, colored pencils, inks, artists tape, ribbon, spray sealer
- Card can be Purchased in My Polished Moxie Etsy Shop: Handmade Polar Bear Birthday Card
Front Panel of My Handmade Polar Bear Birthday Card
 |
| Angle Right - My Handmade Polar Bear Birthday Card |
To create my polar bear birthday card I started by constructing my base card from red cardstock (11" x 4.25"). I scored the cardstock at 5.5" so that my handmade card opens vertically from the bottom to form a tent card.
Next I built the topper panel. I used yellow cardstock for the base of the panel (5.25" x 4") and layered it with polka dot designer paper (5" x 3.75"). I like the fun big polka dots because they give off the same vibe as the springy ribbon I was inspired by.
I punched a strip of apple green cardstock (4" x 1.5") to resemble eyelet lace and affixed it to my panel base. Over the top of the green "eyelet" I attached a thin textured red and yellow ribbon (5"). I wrapped the ends of the ribbon around the edges of the panel and secured them on the back.
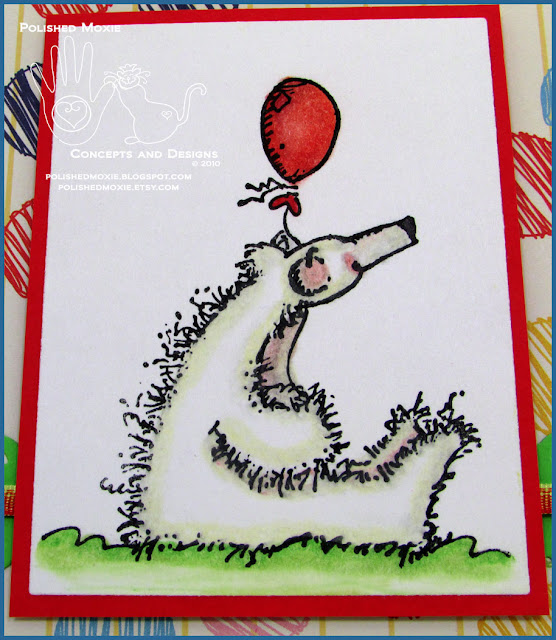
For the focal point of the card I stamped my polar bear image on white cardstock and colored him using gamsol and colored pencils. I used neutral colors to shade the edges of his fur to add depth to him and bring him out from the white background. When my image was complete, I die cut it out (3 3/8" x 2 5/8") and matted it with red cardstock (3 5/8" x 2 7/8").
 |
| Image Panel - My Handmade Polar Bear Birthday Card |
See how my shading gives dimension to my bear and separates him from his background, but still says he's a polar bear.
To complete my topper panel I affixed the image panel with silicon adhesive to pop it from the surface and add dimension to my card. I then attached the topper panel to my red card base using my tape runner.
 |
| Angle Left - My Handmade Polar Bear Birthday Card |
In the picture above you can see the dimension added to my card by the popped image panel and the coloration of my polar bear. The thin striped ribbon adds just a touch of panache.
Inside Panel of My Handmade Polar Bear Birthday Card
 |
| Inside Panel - My Handmade Polar Bear Birthday Card |
I kept the inside of my birthday card very simple. I constructed a panel from cream cardstock (5" x 3.75") and matted it with yellow cardstock (5.25" x 4"). For a little decoration I affixed a strip of the polka dot designer paper (3.75" x 6/8") matted on red cardstock (3.75" x 1"). I attached my completed inside card panel to my red card base using my tape runner.
For my handmade envelope I tried something new. I cut my heavy cover stock (8.5" x 8.5") and scored it, but left it flat for the time being. Lots of times I will cut a strip of the designer paper to embellish my envelope. This time I scanned a piece of the paper into my computer and printed it on my envelope.
I used Photoshop Elements to position the polka dot strip where I wanted it along the left hand edge of the face of the envelope. Before printing it on my envelope paper, I affixed some artist's tape along the outer edge of the upper and lower score lines. This way when the decorative strip was printed on my envelope paper, clean lines were left when I removed the tape. This also gave me some wiggle room on the placement of my decorative strip in my Photoshop program.
Once I had printed the decorative strip on my envelope I finished constructing it and gluing it together. I like the cleaner look of my envelope with the printed embellishment. I did spray it with sealer to protect the image should it be mailed.
Final Handmade Polar Bear Birthday Card and Handmade Envelope Set
 |
| My Handmade Polar Bear Birthday Card and Handmade Envelope Set |
I think my polar bear birthday card set achieved my goal to reflect the vibe of the ribbon cascade. With its amusing bear, fun polka dot paper and bright color combination it speaks happy to me.
This card set is available in my Polished Moxie Etsy Shop: Handmade Polar Bear Birthday Card.
Card Recipe Specifics for Handmade Polar Bear Birthday Card
- Cardstock: Hammermill, Wausau
- Designer Paper: Recollections
- Cover Stock: Staples
- Polar Bear Stamp: Cowtown stamps
- Dies: Spellbinders Nestabilities classic rectangles large and small, MFT Die-namics scallops
- Ink: Stazon jet black
- Prismacolor Pencils: cool grey 10%, blush pink, pink rose, peach beige, cream, apple green, crimson lake, scarlet lake.
- Ribbon: Michael's Textured
- Tools: scoring board, paper cutter, scissors, ruler, blending stumps, computer, Photoshop Elements, Cuttlebug machine, non stick craft mat, tape runner.
- Misc Material: artist's tape, silicon adhesive, tape adhesive, pva adhesive, spray sealer.
- Techniques Used: gamsol, stamping, digital stamping, die cutting
So ends another jaunt along my handcrafting card journey with my handmade polar bear birthday card. A unique card inspired by a colorful, fun ribbon and great for sending a celebratory note to a friend. Thank you for visiting my blog and allowing me to share my handmade card and photography with you. I hope you enjoyed your visit and will come back soon!
Don't forget to show a little "Moxie" love and hit the Polished Moxie like button on my sidebar or to the right of the Polished Moxie logo below :)
Don't forget to show a little "Moxie" love and hit the Polished Moxie like button on my sidebar or to the right of the Polished Moxie logo below :)
Page Content © 2013 Polished Moxie Concepts and Designs


Your card (and photos!) are fabulous! Love the bright colors :) Thanks for joining us over at Frosted Designs!!
ReplyDeleteCute. Thanks for joining us at DigiStamps4Joy for this challenge.
ReplyDeleteMargaret, DT
This is just gorgeous. Love the colours and embellishments. All the elements work so well together. I saw this on MIM and just had to pop over to have a closer look. Loving the photos of the birdies.
ReplyDeleteHugs
Desíre
{Doing Life – my personal blog}
What a fun card! I love that bear. Thanks for joining us at Little Red Wagon.
ReplyDeleteSuch beautiful and cute card and great photo's.
ReplyDeleteThanks for join us at Digistamps4Joy.
Hope you join us next time.
Greetings karin DT member
Fabulous card! Thanks for joining us at Crafts 4 Eternity this week hugs x
ReplyDeleteLove the brightness of the card and a lovely bear too! The cardinals are super! We don't have them here. Thank you for playing with us at Crafts 4 Eternity!
ReplyDeleteAwesome card. I love the vibrant colors and that skinny polar bear. I enjoyed your photos of the birds.
ReplyDeleteThanks for joining our birthday challenge at Creative Card Crew.
Mari
Great card. Great image!
ReplyDeleteThank you for entering!
Jackie DT member ds4j
What a fun card! Love the bright colours
ReplyDeleteThanks for joining us at the Creative Card Crew Birthday Challenge
Margaret xx
The card is really cute and fun... and soooo love your Cardinal pics.. reminds me of Ohio (now living in Phx)..! Thanks for sharing with us at Frosted Designs!!
ReplyDeleteSuper cute and what a wonderful idea for the envelope! Thanks so much for sharing with us at Creative Card Crew this week. Hope you have a fabulous day!
ReplyDelete- Jenn DT
Such a gorgeous card! Love all the colors and fun image! And I love the gorgeous winter birds photos too! Thanks for sharing them, and for playing along with us at ABC!
ReplyDeleteAll that snow, I can't imagine what it's like, but then I live in Western Australia, lol. What a lovely cheery card - ideal for the Lots of Layers challenge at Here Come The Boys
ReplyDeleteThanks for joining in, good luck and hope to see you next time too, Donna ☺
Great card I love the image
ReplyDeleteThanks for joining us at Gingerloft
Caz
Sweet card!!! Awesome pics,too! Thanks for participating in our QKR STAMPEDE challenge!!
ReplyDelete~DEANNE~
Thank you for sharing your lovely work with us at Here Come The Boys, Good Luck with the Challenge Woo xx
ReplyDelete